
DBC: Vendors
Vendor Maintenance is mostly performed in the "New Distributor Admin" interface (New Dist Admin). However, there are a few processes still available in Legacy Dist Admin.
New Dist Admin
This is where vendors are created within DB Commerce, as well as where vendors’ notification preferences are configured. Certain functions such as “Show Vendor/Item Assignment," "Bulk Vendor Assignment," and the “Vendor Item Status Report” must continue to be accessed through the Legacy Dist Admin interface until further notice.
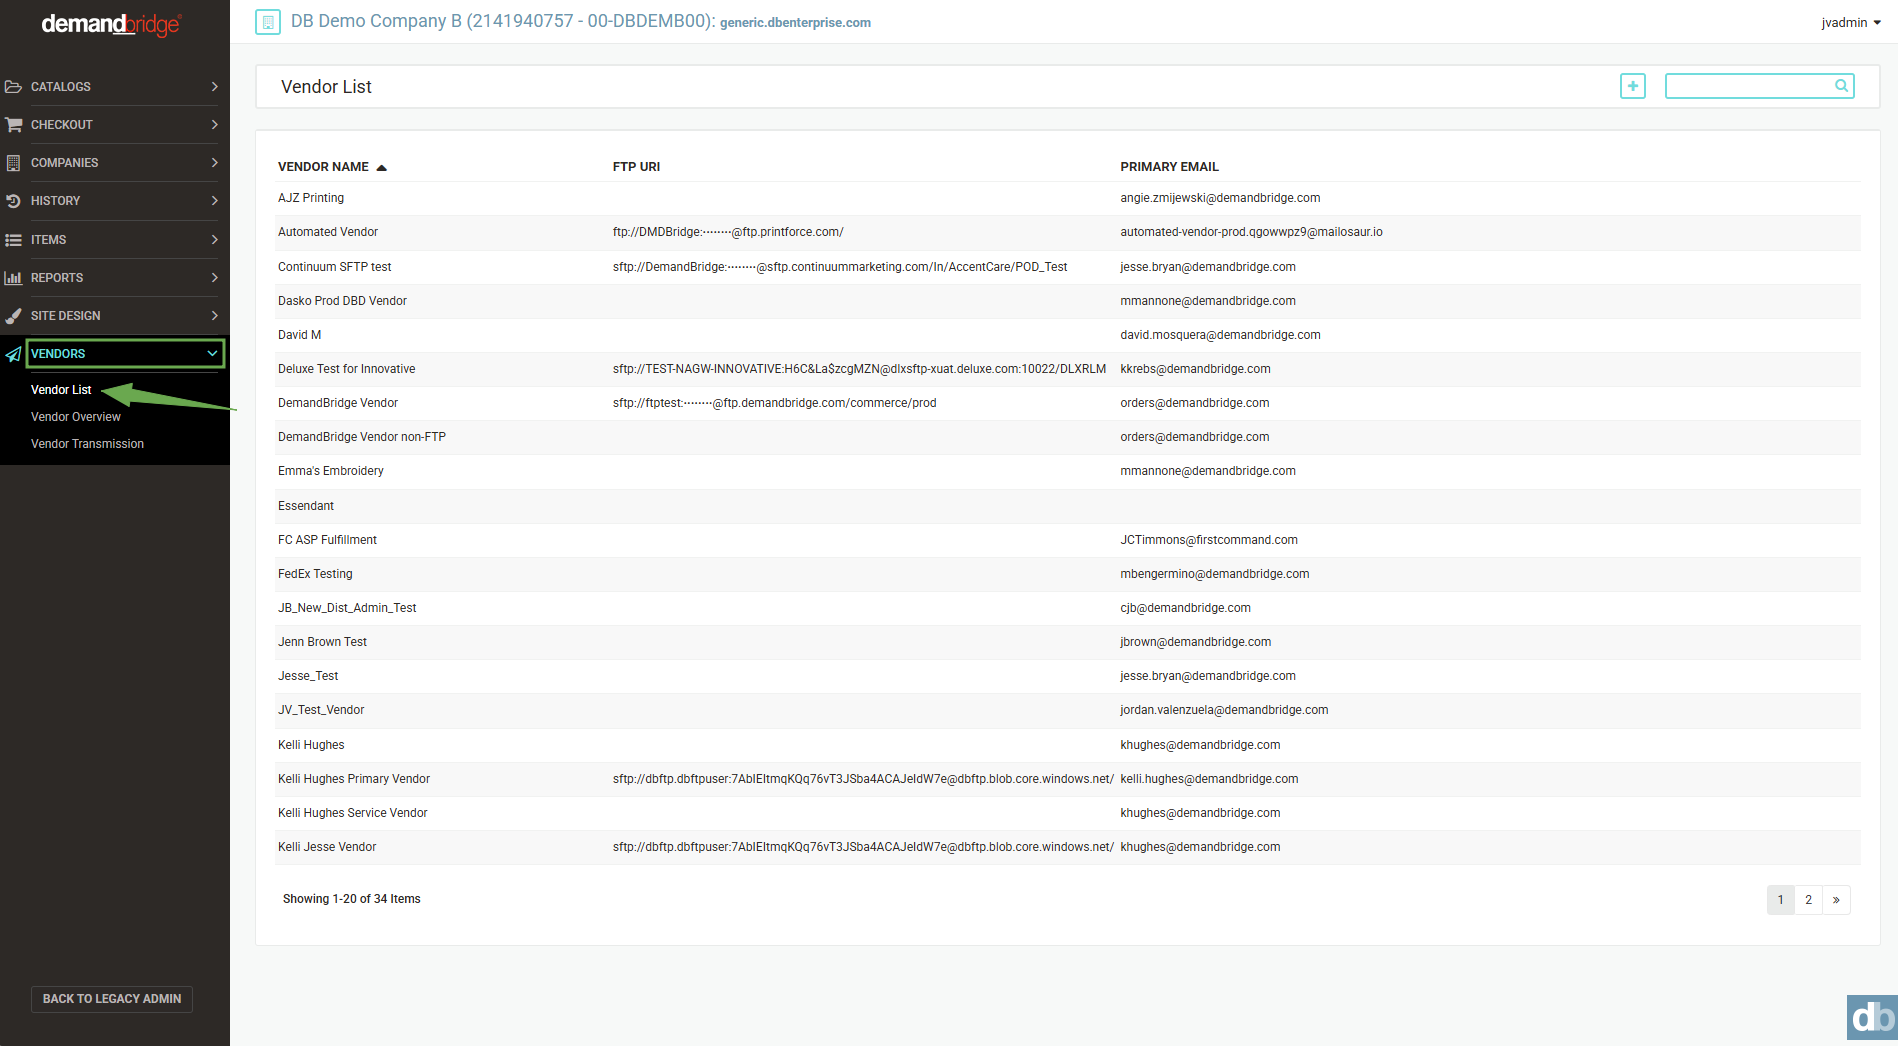
Vendor List
All vendors that have been setup for your distributor in DB Commerce will appear within the vendor list (This list does NOT include all vendors that exist in your back-office system). As needed, vendors that produce items available on DB Commerce sites can be added to the list by clicking the “+” icon at the top of the page.
The list is sorted alphabetically by Vendor Name and includes columns for vendors FTP URL and "Primary Email address." Entering keywords such as part of a vendor name or email address into the search bar will filter the list accordingly.
Hovering over a row will prompt an “edit” icon to appear, that when clicked, will direct the administrator to the Vendor Overview page where they can make modifications (double-clicking a row will have the same effect).

Vendor Overview
Within the Vendor Overview, administrators can make various updates, from linking the DB Commerce vendor to a corresponding vendor in their back-office system, to designating who from that vendor receives order notifications and how they receive them, as well as which items that vendor is assigned to.
General Information
This is where the DB Commerce vendor record is created. It is possible for vendors to be created in DB Commerce that don’t already exist in your back-office system, and vice versa.
Note: vendors assigned to Promo Items must be setup using a valid Vendor Code that exists in your back-office system.
Click on the "Select Vendor Code" button to bring up a list of vendors that have been transmitted over to DB/c from your back-office system. You can also select a Plant Code if necessary.

FTP Transmission Settings
For vendors who wish to receive order notifications via FTP as opposed to (or in addition to) email, this is where administrators can specify the receiving destination, and credentials to access that directory. Clicking the Test FTP button will initiate an attempt to connect to the specified URL and will result in feedback indicating whether the information entered is valid or not.

Email Transmission Settings
Here, administrators can designate one or many recipients of order notifications and enable a series of permissions that drive how those emails are delivered. If multiple contacts wish to receive order notifications, one contact can be entered into the “Primary Email” field, and additional recipients can be entered into the “Secondary Email” field, separated by semicolons.
In addition to the standard text data that is sent to the vendor, you can choose if the data should be sent via an XML file. The following options are available:
- None – XML is not included with their print request.
- Regular File – will include XML formatted request in addition to the plain text request.
- XML Only – will send XML formatted request only.
If you select "Regular File" or "XML Only," you will be prompted with another field, XML Version.
- Version 2 is the base version.
- Version 3 will add the ability to Show Cost in the XML file to the vendor.
- Version 4 will add the ability to pass over the Country in the XML file to the vendor.
Additional options can be configured to each vendor’s unique preferences:
- Show Cost – Turning this option on will allow the cost information of the items to be sent in the XML file to the vendor (this is only available if you select Versions 3 or 4).
- Show Ship To Info – Turning this option on will allow the ship-to info to be sent in the XML file to the vendor.
- TP Lines – This option will allow the final line number assigned on the DB/d side to be shown to the vendor. This may differ from the DB/c line number at times. For example, in the case where companion items are added on the DB/d side.
-
Attachment on Email Included with FTP – If this vendor is setup for FTP transmission, checking this box will indicate you do want artwork files (attachments) to be included on the vendor e-mail as well. Leaving this box unchecked will trigger file attachments to be sent to the vendor’s FTP address but will not be included as e-mail attachments.
This is designed to assist in sending large attachments to FTP only.
-
Consolidate E-mail – If the vendor has multiple lines on the order, they will typically receive one e-mail per order line. If this option is turned on, all their lines will be consolidated into one e-mail.
Note: Please consider file size when turning on this option. If the vendor receives attachments totaling more than 10 MB, the e-mail will fail. The FTP option would be used as a back-up method when this is enabled.
-
Simplify Attachments – This option can be used to automatically rename file attachments being sent to the vendor, but only if there is not more than one file attachment per line. If this option is turned on, a file attachment would no longer use its original name but would be renamed in the “order number + order line number + original file extension” format.
This is used to assist vendors that have automated processing and expect all file attachments to be named in this format.
- Send Variable Data – If this option is enabled, the variable print data fields used for a specific line item will be added into the XML file attachment (which must be enabled).
- Zip Attachment Files – If this option is checked, it will zip all attachments to reduce the file size in the email notification.

Assign Items to Vendor
In this section, a vendor can be associated to one or multiple items. A tabbed display allows administrators to see a filtered list of just those items which have been associated to the vendor, versus a cumulative list of all items that have been setup for a selected company (unlike Catalogs and Items, Vendors are specific to a distributor rather than an individual company, so company selection isn’t forced automatically).
After selecting a company, searching for some or part of an item code or description will filter the list of items accordingly. To assign items to a vendor, simply click the tab with the company name, and click the checkbox next to the desired items.
Items that have been setup under other companies may also be assigned to a vendor by clicking the icon next to the current company tab and selecting another company from the list. Clicking the checkbox above the item list will select all items on the current page of results and enable multiple items to be assigned or removed at once.

Company Reference Codes
Your customers’ company names appear to vendors in print order requests. If a vendor identifies a customer by another name or alias, a reference code may be used instead.

Suspending Vendor Transmission Status:
This option allows you to suspend order transmissions to the vendor.
Use case:
- If vendor FTP server is down and you need to halt orders.
- If you need to reassign items to a new vendor.
- Login to New Dist Admin.
- Click Vendors > Vendor List
- Select the vendor.
- Under General Information, change the Transmission Status to "Suspended."
Legacy Dist Admin
Show Vendor Reference Codes
The section "Work With Vendors" allows you to view and create unique codes for a company/vendor combination to send along with the order(s). This screen will initially show all reference codes that have been setup for all companies/vendors.
You have the option of limiting the list to show all reference codes that have been setup for a company, or to see all the companies that have a reference code setup for a specific vendor.
Next to any of the existing reference codes, you can click the Edit or Delete links to either modify the existing reference code or remove it completely. At the top of the page, there is a link to "Create a New Vendor Reference Code." Click on this link and you will be brought to the following page.

To create a new reference code:
- Enter in the reference code that you would like to use.
- Select the vendor that this applies to.
- Select the company that you are creating this reference code for.
- Click the Create button.
Show Vendor/Item Assignment
This section is used to simply view the vendor that has been assigned to items, or to see the items that have been assigned to a vendor.

In the "Show Vendor(s) by Item" section, you will need to select a company. When the company is selected, a listing of their items will appear. You can then select any items as needed and click the Show Vendor button to display a listing of those selected items, and the vendor that is currently assigned to those items.
In the "Show Items by Vendor" section, you will need to select a vendor. You will then click on the Show Items button to display a listing of all items (along with their company) that have been assigned to that vendor.
Bulk Vendor Item Assignment
This section is used to assign multiple items for a company to a vendor at one time.

To bulk assign your items to a vendor:
- Download the template by using the link provided.
- Select a company you would like to bulk assign items for. This will bring up a listing of the companies’ items, and which vendor the items are currently assigned to.
- Select the vendor they should be assigned to.
- Click Choose File and browse for the completed template you previously downloaded.
- Enter an email address to receive notification and logs when the bulk assignment is completed.
- Click on the Enqueue Task button.
- Once it is completed, you will receive an email notification with the logs. Please review the logs to ensure the bulk assignment was successful.
Vendor Item Status Report
This report will be run by vendor, and you have the option of limiting the results based upon a date range. For each line transmitted to the vendor, you can see the transmission method (e-mail/FTP), the date and time the line was ordered and transmitted, and the tracking information for the line (if uploaded by the vendor).
You can export the data by clicking "Export Current Report (.csv)" at the bottom.
