
DBD: Configure User Defined Fields
While DB Distributor provides comprehensive standard data fields for tracking customers, items, and vendors, your organization may require unique data points to match legacy workflows, specialized tracking metrics, or custom business logic.
To accommodate this, the system provides User Defined Fields (UDFs). UDFs are configurable, distributor-customizable attribute screens that allow you to capture and label bespoke metadata across three core entity layers.
Field Structure & Database Mapping
The custom field labels are established in a central system setup layer (the definition layer), while the literal values assigned to an individual customer, item, or vendor record are stored in dedicated backend tables:
| Entity Target Type | Primary Database File Location | Common Operational Use Cases |
| 👥 Customer UDFs | ASW Table (ASW_CustUserDef ) |
Region, Territory, Customer Type, |
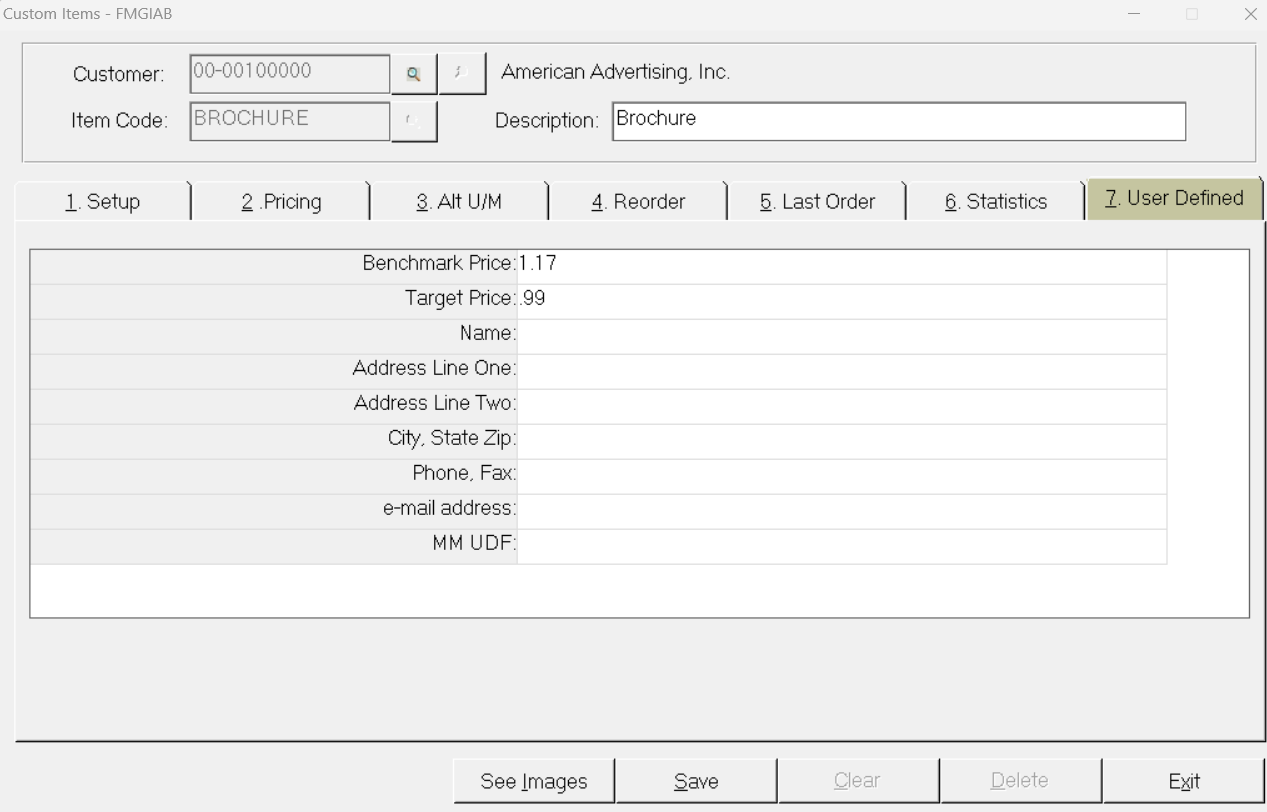
| 📦 Item UDFs | FTL Table (FTL_FormUserDef ) |
Benchmark Prices, Target Prices, Item Groups |
| 🏢 Vendor UDFs | APB Table (APB_VendUserDef ) |
Vendor Tiering, Compliance Ratings, Alternative Sourcing Codes |
How Key/Value Mapping Works
Each UDF is identified by a system-assigned Field Number (e.g., 0001 , 0002 , 0003 , 0004 ) and stores data as a discrete key/value pair. The system maps the field number directly to whatever your management team has defined it to mean in the system setup file (ASV ).
Because field labels are completely customizable, your system administrator can rename them to mirror your operational terminology (for example, renaming a field to "Target Prices" to precisely match a legacy system name during a database cutover).
Administrative Setup: Creating a New UDF Field
Before your data-entry team can utilize the User Defined tab on an item, customer, or vendor record, an administrator must define the field number and create the custom label.
- Navigate to: Accounts Receivable → Setup → User Defined Fields
- Select the Entity Type: Choose whether you are configuring fields for Customers, Items, or Vendors.
- Assign the Field Number: Select an available, unassigned field slot from the system list (e.g.,
0001,0002,0003). - Define the Field Label: Type the literal name of the attribute exactly as you want it to appear in the graphical interface (e.g., type
RegionorTarget Price). - Save and Commit: Click OK to commit the configuration to the master setup file (
ASV).
Once saved, the system dynamically updates the corresponding asset screens, and the new field will instantly appear as an active data entry box under that entity's User Defined tab.
Accessing UDFs
For daily data entry and inquiries, user-defined fields are seamlessly integrated into your primary asset workspaces.
- Navigate to your target entity screen (e.g., Item Setup/Inquiry, Customer Constant Data, Vendor Constant Data).
- Select or search for your specific record.
- Locate the tab selector row at the top or side of the layout and click the User Defined tab.
- The screen will dynamically render the custom field labels and entry grids configured for your specific environment.
⚠️ Important Access Rule: The system does not natively support field-level security constraints inside the User Defined panel (i.e., you cannot restrict editing permissions for Field 0002 while leaving Field 0004 open to the same user).
Security parameters are governed holistically. Access is managed through broader, role-based screen security configurations that dictate whether a specific user class has full Read/Write access or strict Inquiry-Only access to the entire User Defined panel.