
DBC: Chili - InDesign Plugin
The GraFx Publisher Converter for Adobe® InDesign® makes it easy to take a customer’s design file and convert it directly into CHILI BackOffice—no need to copy an existing template or start from scratch. To ensure a smooth transition, just make sure your InDesign file is cleaned up before converting.
Download GraFx Publisher Converter for Adobe® InDesign
CLICK HERE to download the latest GraFx Publisher Converter for Adobe® InDesign.
The plugin has been tested and is compatible with Adobe® InDesign® versions from 2024 and 2025. The latest tested version is 20.1 (January 2025).
How to access Converter?
You can find the GraFx Publisher converter in Adobe® InDesign® under the "Window" menu.

There are two ways of working: online and offline. When working offline the conversion of the document will happen locally and the end result will be a GraFx Publisher Package file [.zip] saved to your local drive.
This file will contain the converted document as well as all the images and fonts used in the document. This file will be uploaded to GraFx Publisher in a later stage.
When working online, a direct connection is made. To do that you specify the link to the server, the environment where you want to upload the document, and a username and password.
Once logged in you are presented with a similar interface as when working offline. If you are logged in as an admin you are still able to select another environment if necessary. In this mode, the converted file, images and fonts will be uploaded immediately to the server after conversion.
Working in online modus also offers you the possibility to convert a GraFx Publisher document back to InDesign® via the "Export to InDesign®" panel.
Export an InDesign® Document to GraFx Publisher
Cloud Server Panel

- Preset: From the drop down menu you can select previously saved login settings. When you regularly need to connect to different servers this will save you time.
- New - Save - Delete: Via these buttons you can save and create presets for different connections to GraFx Publisher servers or different environments on one server.
- Preset name: Name used for the preset when saving connection settings
- URL: Connection to a GraFx Publisher server. http:// your server IP address or domain /CHILI/main.asmx
- URL: Distributor Admin URL followed by /CHILI/main.asmx
- Example: https://admin.dbenterprise.com/CHILI/main.asmx
- Environment: Specify the environment for which you have an account
- Environment: The name of your Chili Environment. The URL to access Chili Backoffice is provided during training. Within that URL is your Chili Environment name if you aren’t sure.
- Example: https://admin.dbenterprise.com/CHILI/DemandBridgeTraining/interface.aspx
- Name: User ID you enter to access Chili Backoffice
- Password: Password you enter to access Chili Backoffice
- Auto login: click this button to login to the server and environment
-
Status: displays the connection status
Import Settings Panel

- Preset: From the drop down menu you can select previously saved login settings. When you regularly need to connect to different servers this will save you time.
- New - Save - Delete: Via these buttons you can save and create presets for different connections to GraFx Publisher servers or different environments on one server.
- Preset name: Name used for the preset when saving connection settings
- Documents specifies the destination path of the document on the GraFx Publisher server after conversion.
- Images: specifies the destination path of the images on the GraFx Publisher server after conversion.
- Fonts: specifies the destination path of the fonts on the GraFx Publisher server after conversion.
- Paths can be entered manually or selected via the browse button. If the destination folder doesn't exist yet, it will be created automatically.
- Log file: specifies the destination path for the log file. This is a local path on your computer (f.e. path on a macintosh: /Users/Usersname/chiliLog.txt)
- Log detail: Specifies the level of detail when logging items in the log file.
- Include Document Preview creates a preview of the InDesign® file along with the conversion
- Convert gradients to PDF will convert complex gradients to pdf and places them as an image in the online document.
- Include hidden layers includes the hidden layers of the InDesign® document
- Use high resolution for locked layers converts everything on the selected layer to pdf and places this on the layer
-
Import selection only converts only the frames selected in the document.
Export to GraFx Publisher Panel

- Source specifies the document to convert (as multiple document can be opened in InDesign®)
- Destination allows to switch between online (server) or offline (package) conversion
- Environment let's you specify the environment where the converted document will be uploaded to [the selection is only available if your account gives you access to multiple environments]
- Pages: Specify the range of pages to convert or convert all pages
- Locked Layers is used to lock all elements on the selected layer [and the layer] automatically in the online version after conversion Saving you time. Layers with "lock" in the name or layers called "background" will be selected here by default
- Go! Starts the conversion. When you're working in offline, you will be asked where to save the package file after conversion
- Open document in browser Only available in online mode. After conversion the document will be opened in your default web browser when this is checked
- Create ZIP starts the conversion and the creation of the CHILI Package in offline modus
Export to InDesign Panel

- Environment let's you specify the environment where the target document can be found
- Document Name Select the file for conversion
- Layout specifies which alternate lay-out will be converted in case the CHILI document has several defined [more about alternate lay-outs can be found here: Alternate Layouts]
- Export setting specifies which IDML preset to use for the conversion. More information can be found here: IDML conversion settings
- Destination folder specifies the save location on your local disk
- File name: Name of the file after conversion
- Create document folder creates a folder that will contain the converted document and the assets and fonts
- Export initiates the conversion process
Tips for Cleaning Up Your InDesign File Prior to Converting into Chili
- Delete all the elements or layers that aren’t been used.
-
Use the correct names for the layers:
• Elements that are locked on the ‘locked’ layer’
• Elements that are used for variables on the ‘variable’ layer’
• Frames that need to be editable on the ‘editable’ layer’
-
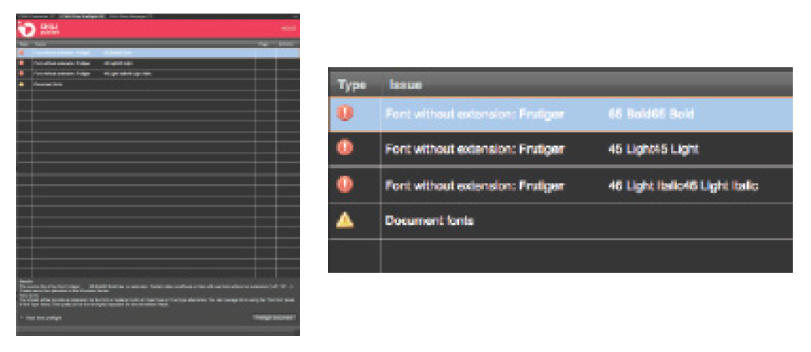
Use all the correct fonts in the document, the convertor will check these for uploading on the Chili server.
- Try to keep your file as small, in filesize, as possible. Crop images on the correct size, delete extra frames. The larger the file, the longer the conversion will take and the template will slow down in the front-end.
-
Delete all the color swatches that aren’t been used. Every swatch in your InDesign document will be converted to Chili.

- When using Paragraph or Character Styles, give names that clearly state the subject. These styles will be fully converted to Chili.

