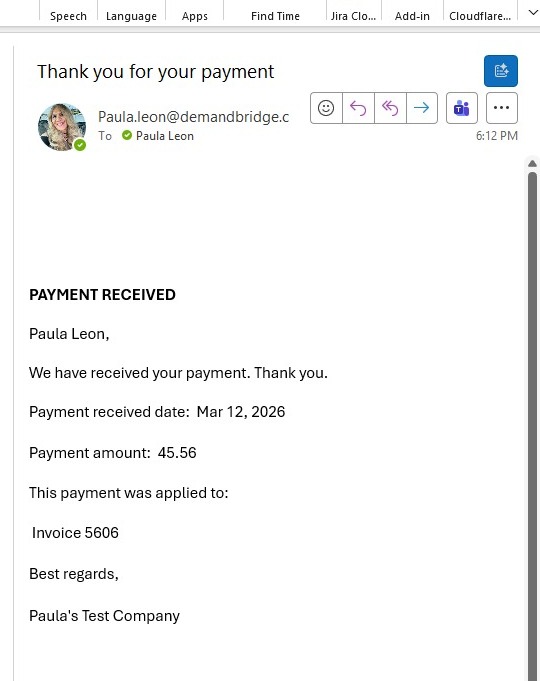
EQD: DBPay - PaybyLink: How to Send a Second Receipt for a PBL Payment
Made by Paula Leon with Scribe
This process is used when a client requests a second receipt after the original receipt has already been sent.
Tip: This Scribe covers three key areas:
- Setting up automatic receipts at the global level.
- Setting up automatic receipts at the client level.
- Sending receipts through A/R Receipts Editing
Part 1: Global Level Setup
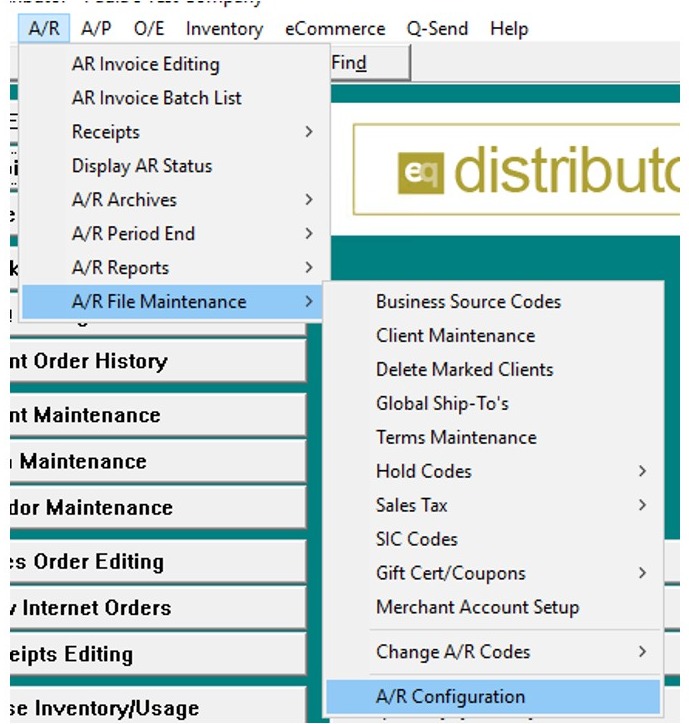
1. Navigate to AR > AR File Maintenance > AR Configuration.
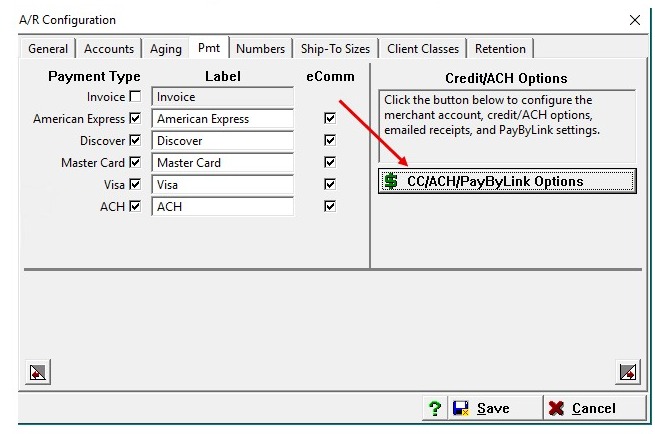
2. Click CC/ACH/Pay By Link Options
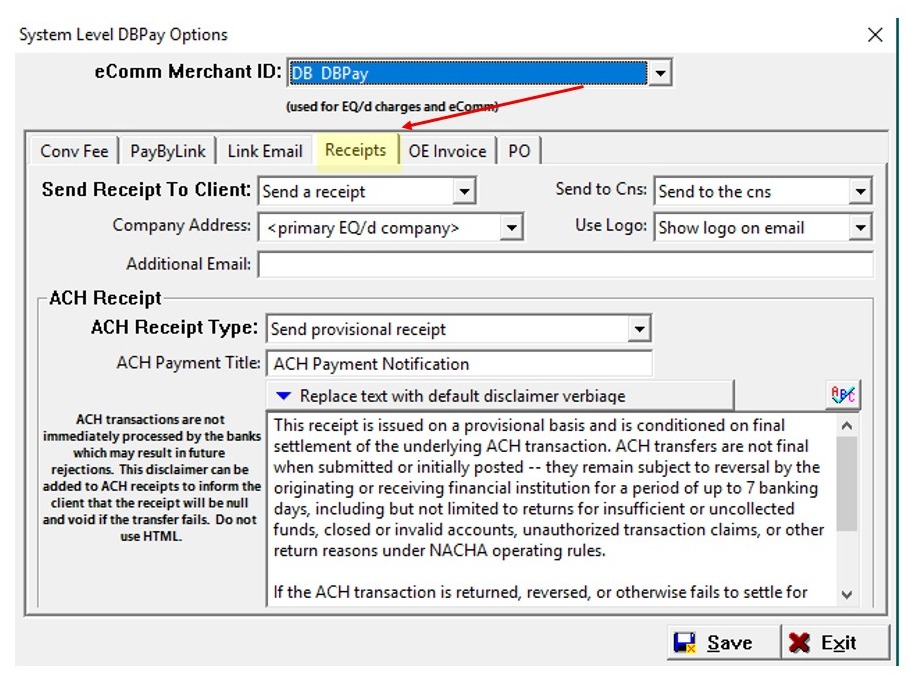
3. Go to the Receipts tab and turn on the setting to send an email receipt to the client. Click Save, then Exit.
This sets the default for all clients. A client can override it.
Part 2: Client Level Setting
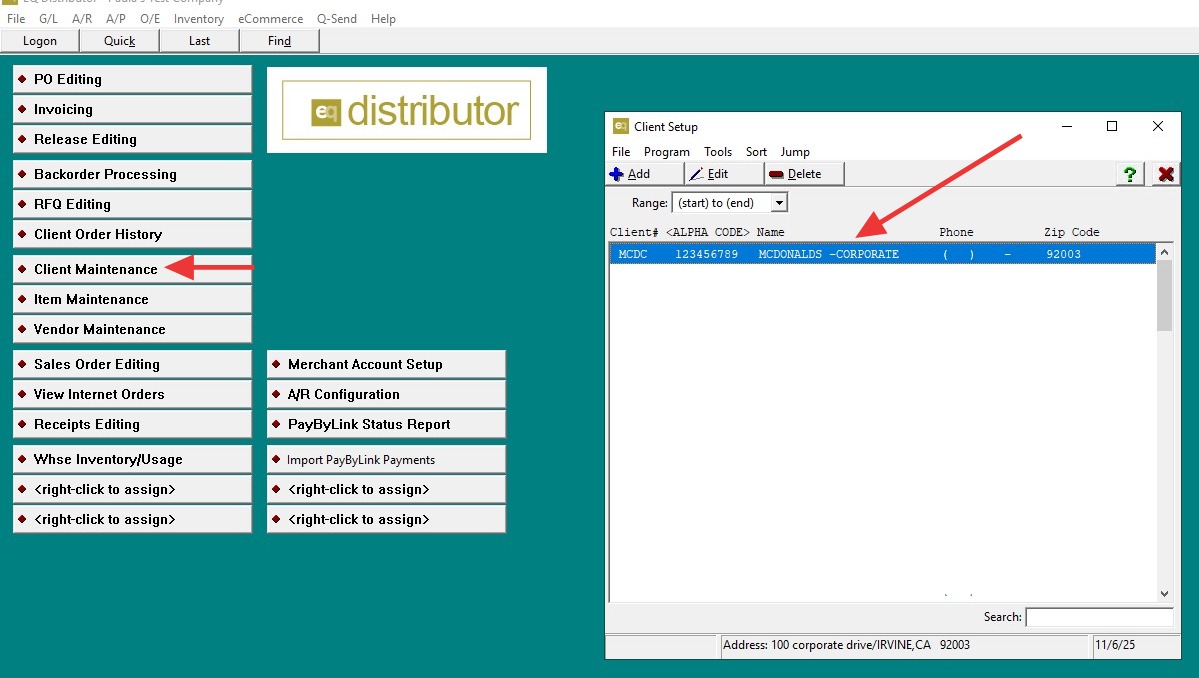
4. Navigate to Client Maintenance and pull up the client you want to configure.
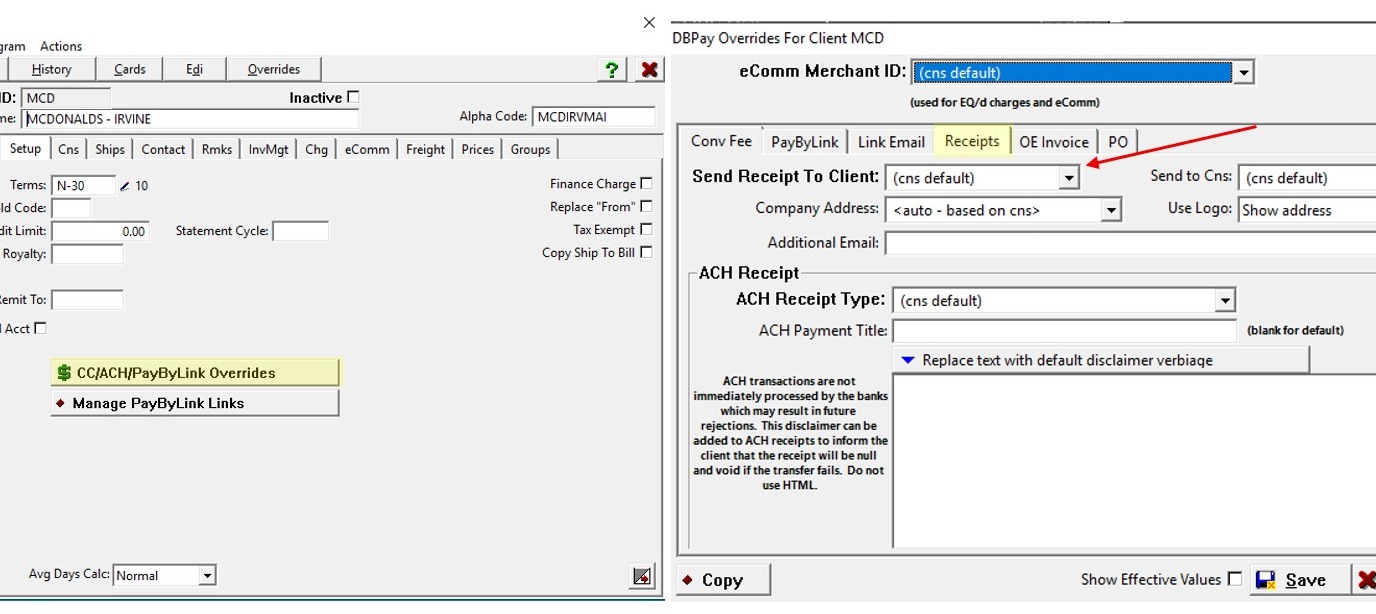
5. Click CC/ACH/Pay By Link Options and go to the Receipts tab. Leave the receipt setting on the default, or change it to send or not send receipts for this client. Click Save & Exit.
A client setting overrides the system-wide setting.
Part 3: Sending a Receipt Through AR Receipts
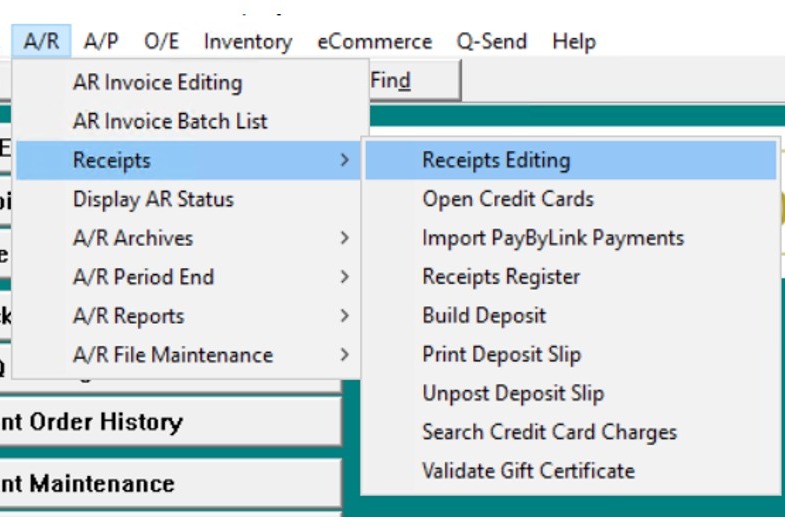
6. Navigate to AR > AR Receipts > Receipts Editing.
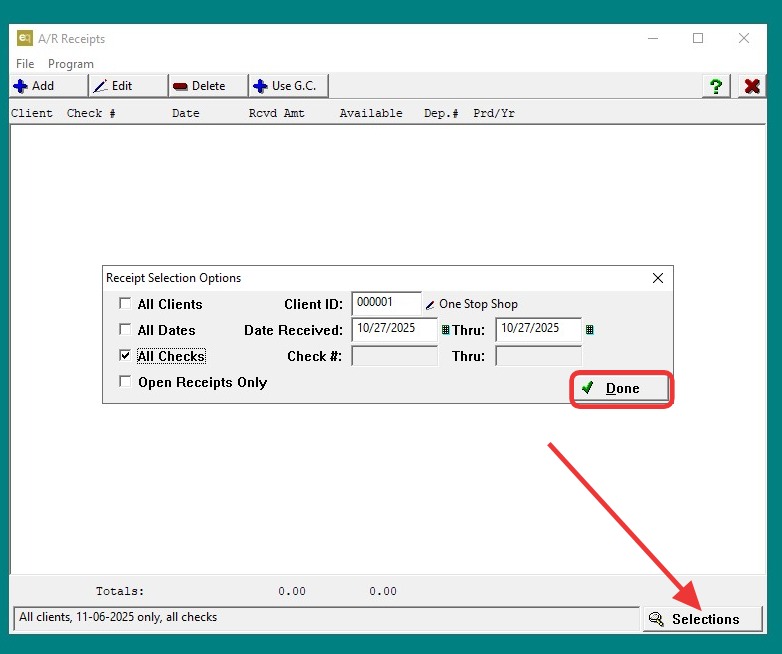
7. Scroll to the very bottom and click Selections.
- Select the client and the date range for the receipts you want to send.
8. Check the receipt(s) you need to resend.
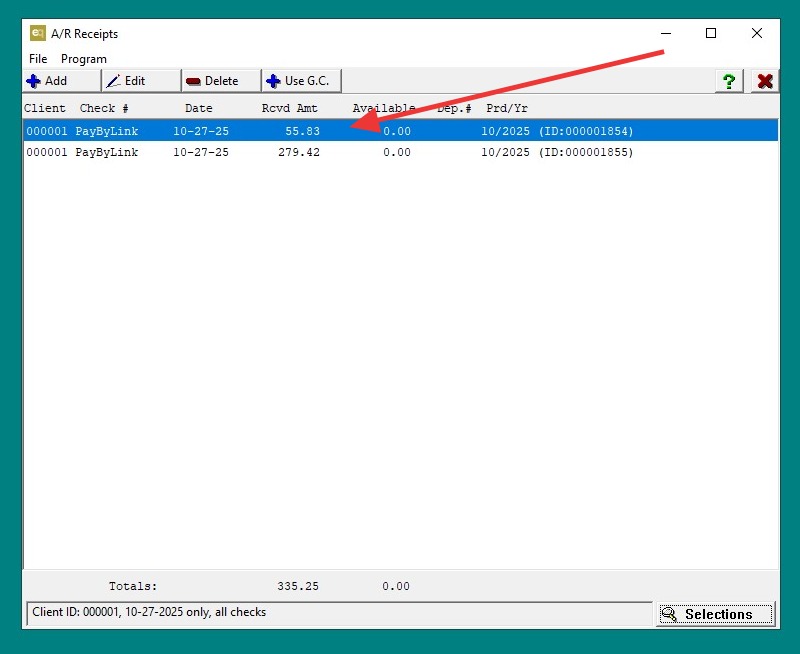
9. Open the receipt, then go to Program > Email Receipt to Client.
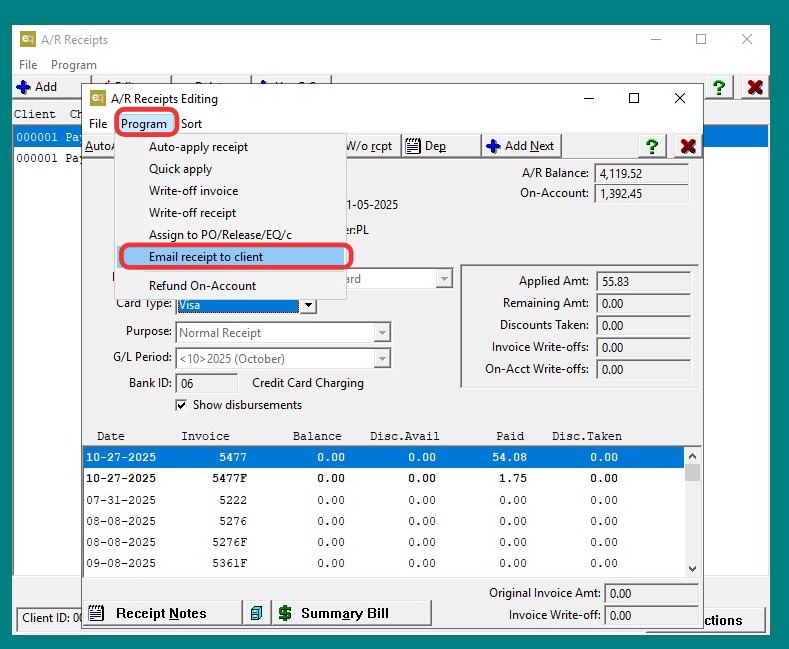
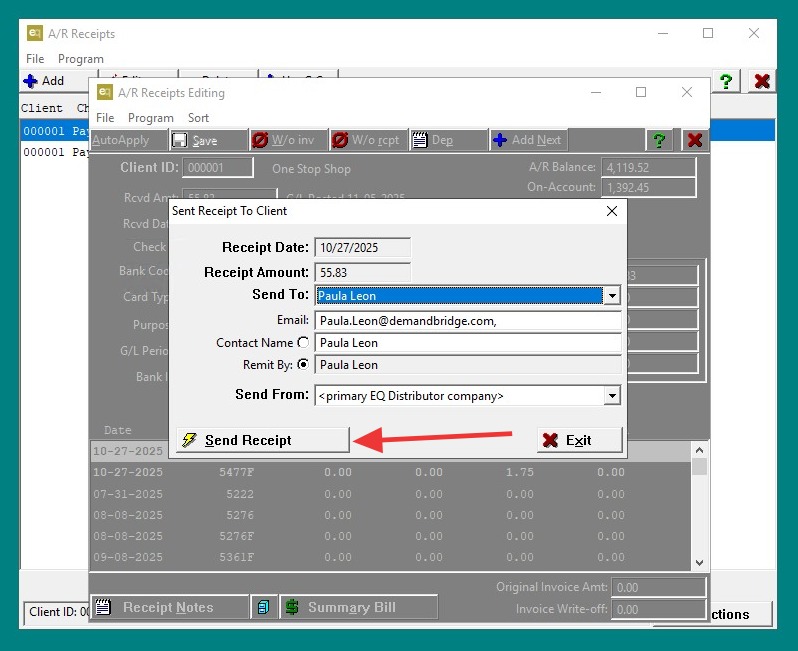
10. Configure the email address of the recipient.
- Click Send Receipt.
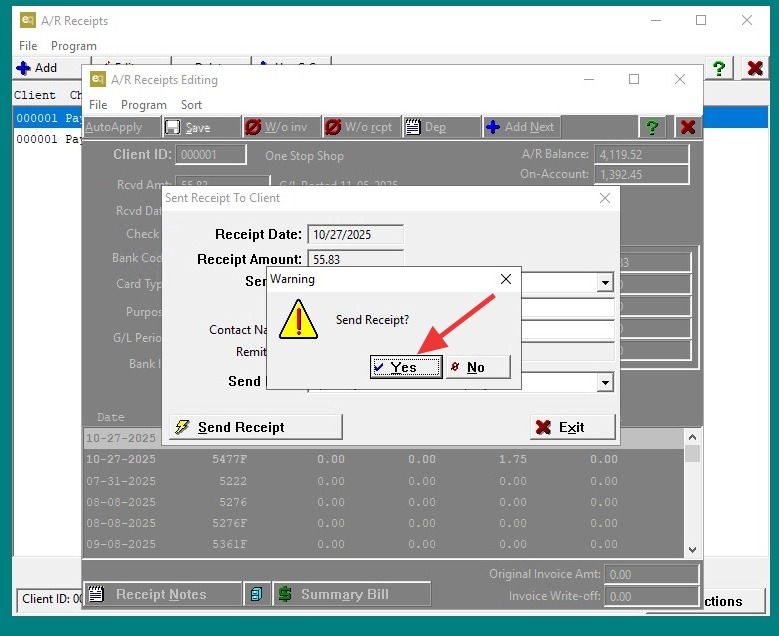
11. Click "Yes"
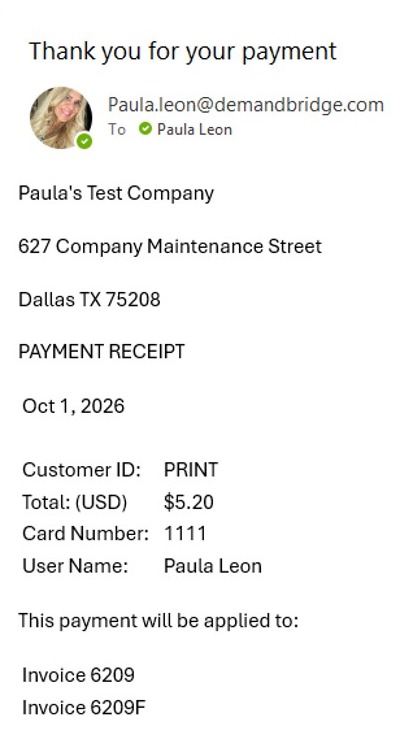
12. Screenshot: Shows the system-generated receipt sent through AR. The receipt shows:
- Customer ID
- Total
- Last four digits of the card number
- User name
- Invoice numbers (original invoice and fee invoice)
Depending on your configuration, the fee invoice has either a new number or the original number followed by an F.
This process is used when a client requests a second receipt after the original receipt has already been sent.
Tip: This Scribe covers three key areas:
- Setting up automatic receipts at the global level.
- Setting up automatic receipts at the client level.
- Sending receipts through A/R Receipts Editing
Part 1: Global Level Setup
1. Navigate to AR > AR File Maintenance > AR Configurations.
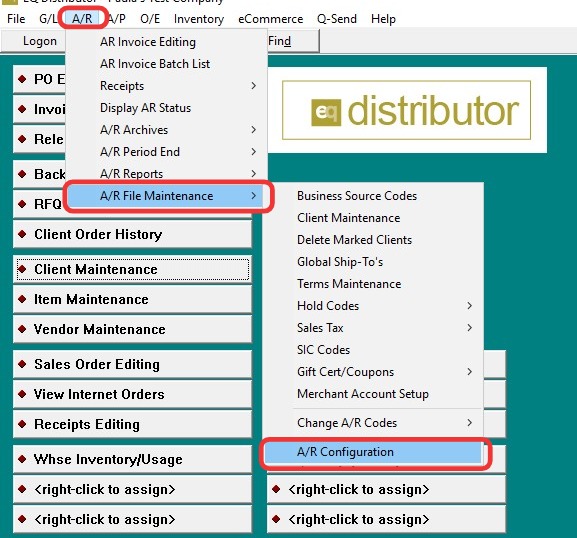
2. 1. Scroll to the very bottom of the screen.
- Check the box: “Send Email Receipt to the Client”.
- Click Save, then Exit.
> This ensures that all clients automatically receive an email receipt when they pay via Pay-By-Link.
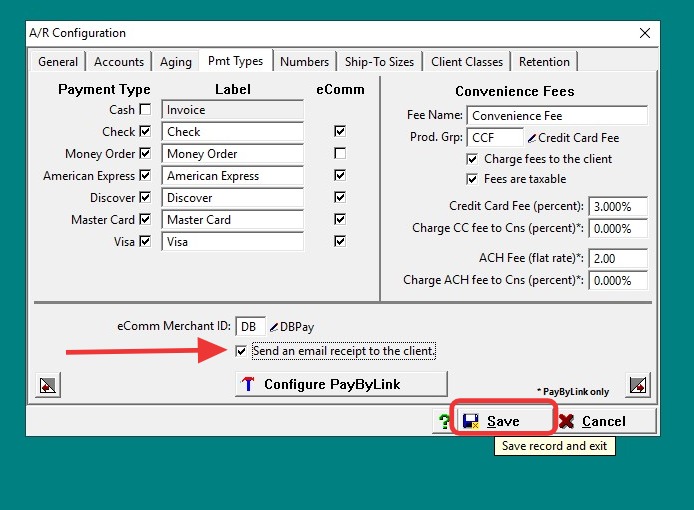
Part 2: Client Level Setting
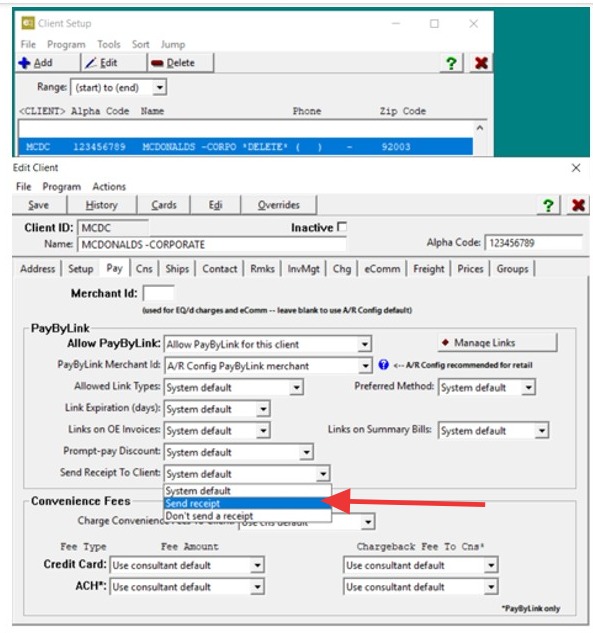
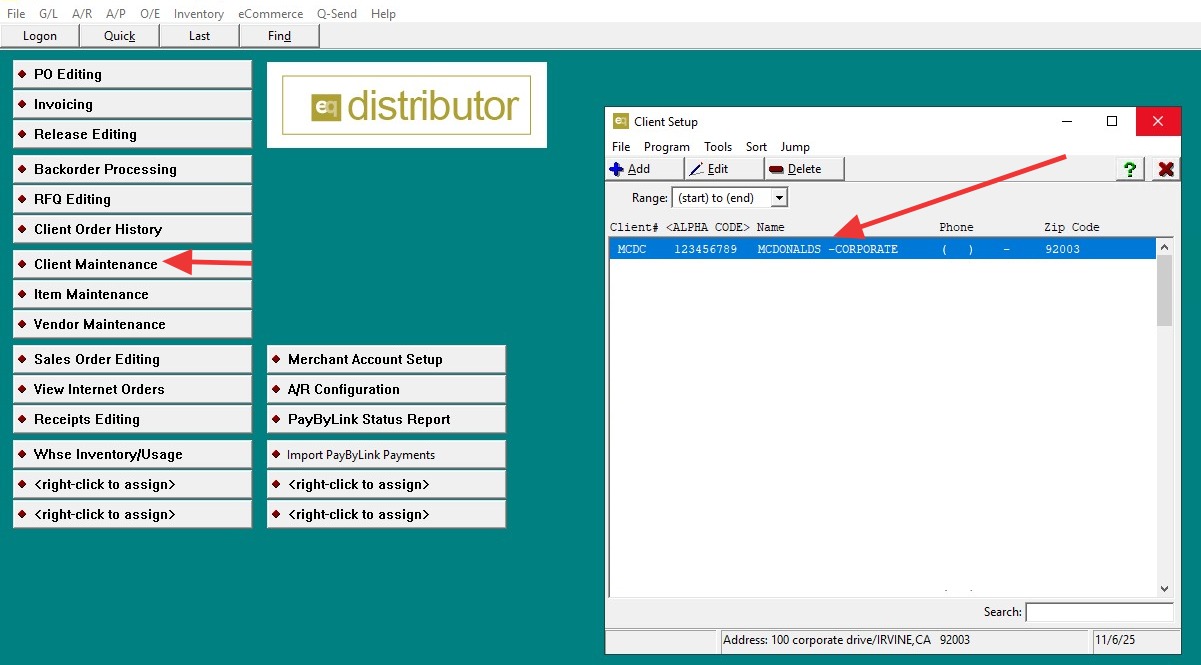
3. Navigate to Client Maintenance and pull up the client you want to configure.
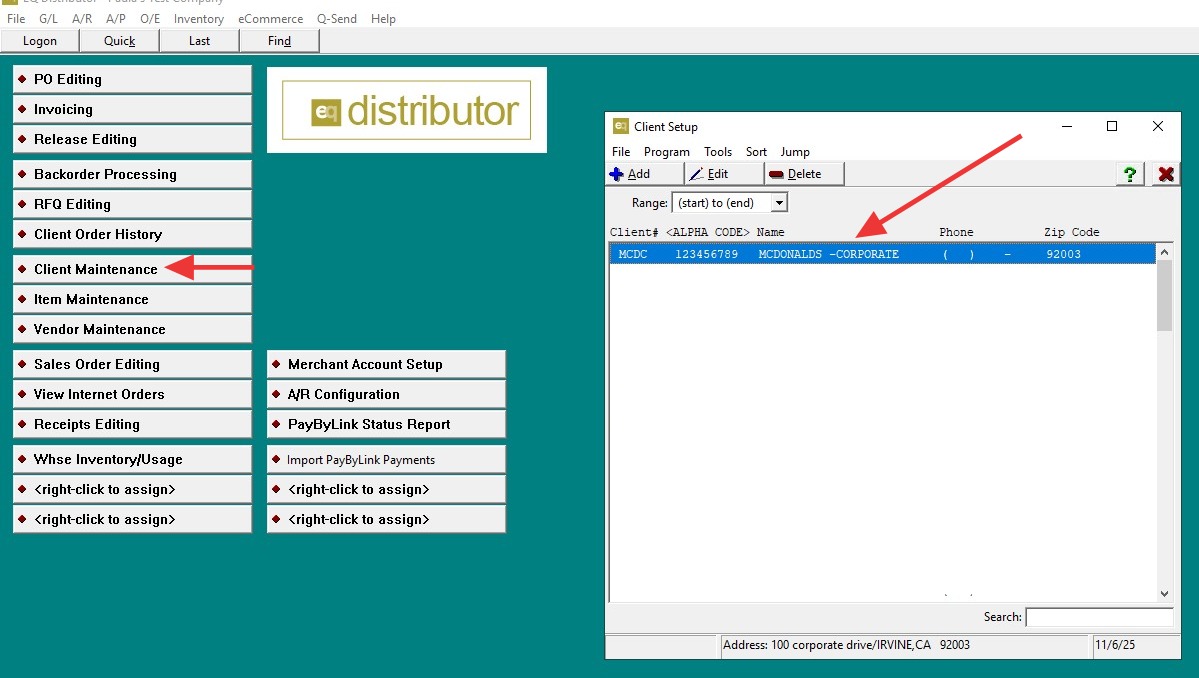
4. 1. Go to the Pay tab, about halfway down the screen.
- Here you can choose to either:
- Use System Default (inherits the global AR setting), or
- Send Receipt to Client (override global setting and send receipts for this client or not send).
5. Click Save & Exit.
> This allows control of receipt settings on a per-client basis.
Part 3: Sending a Receipt Through AR Receipts
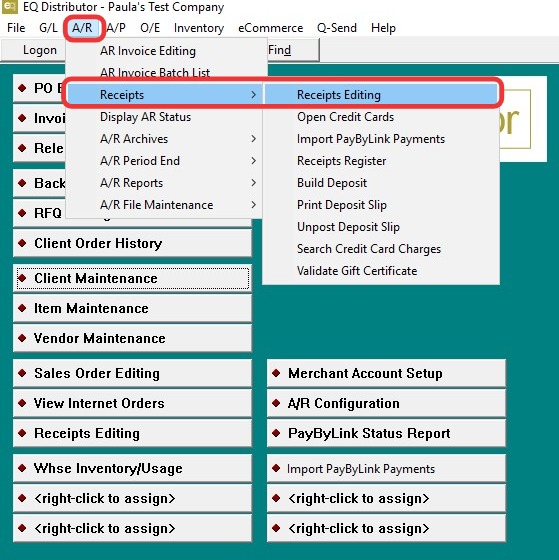
6. Navigate to AR > AR Receipts > Receipts Editing.
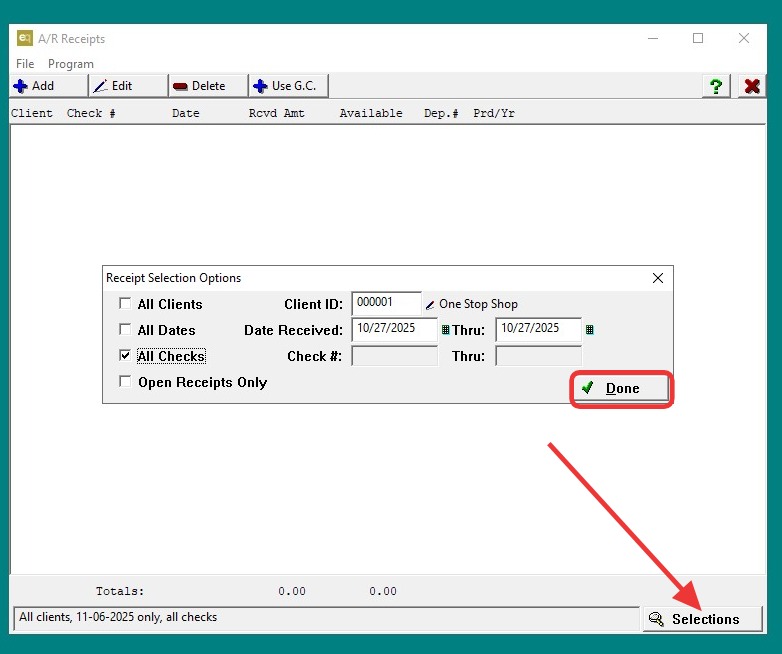
7. Scroll to the very bottom and click Selections.
- Select the client and the date range for the receipts you want to send.
8. Check the receipt(s) you need to resend.
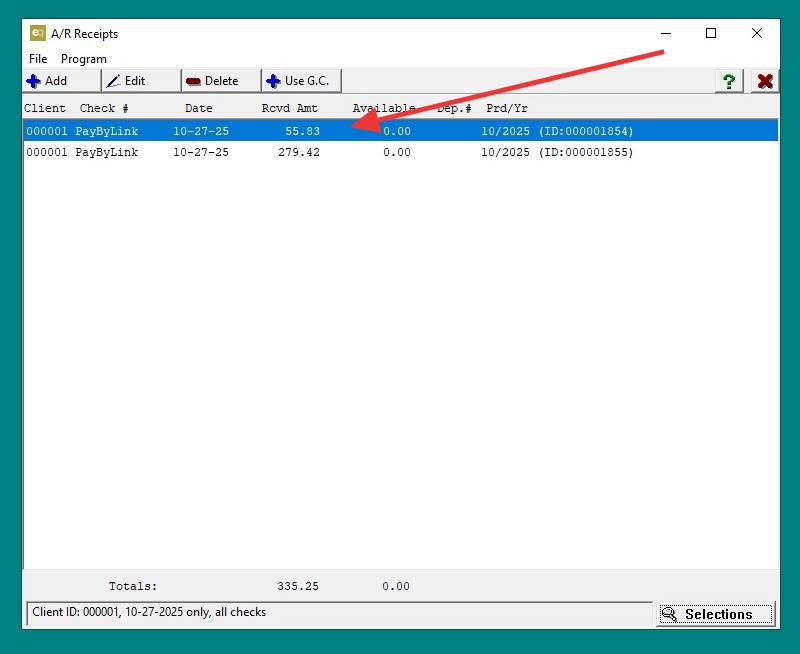
9. Open the receipt, then go to Program > Email Receipt to Client.
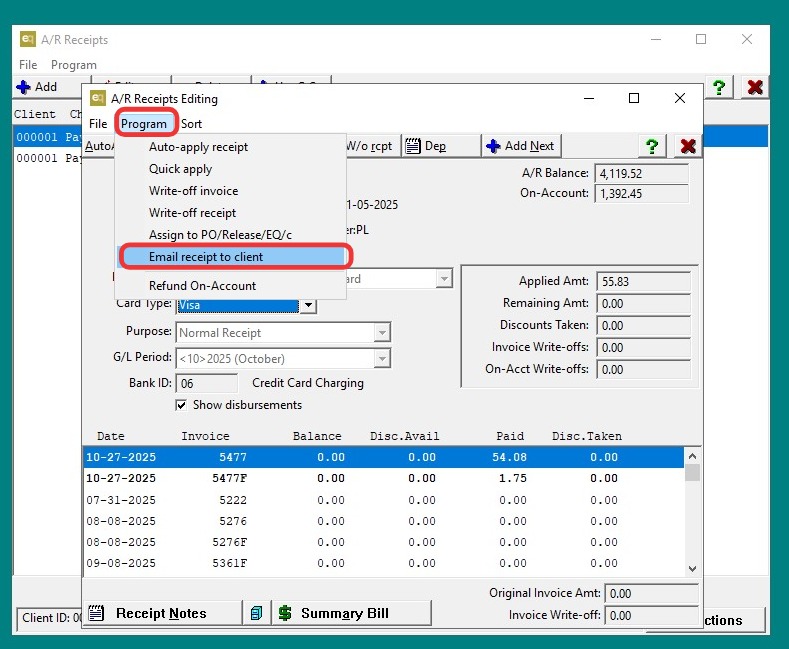
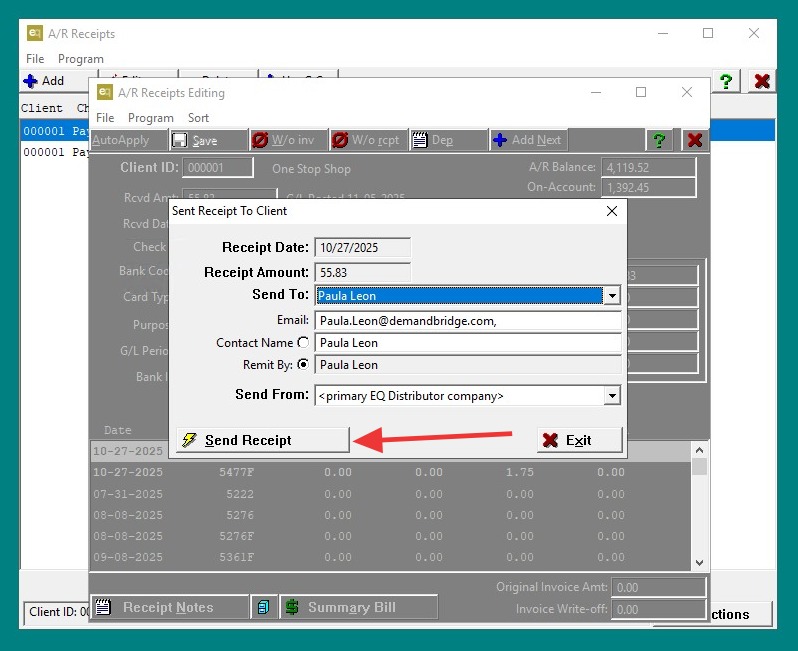
10. Configure the email address of the recipient.
- Click Send Receipt.
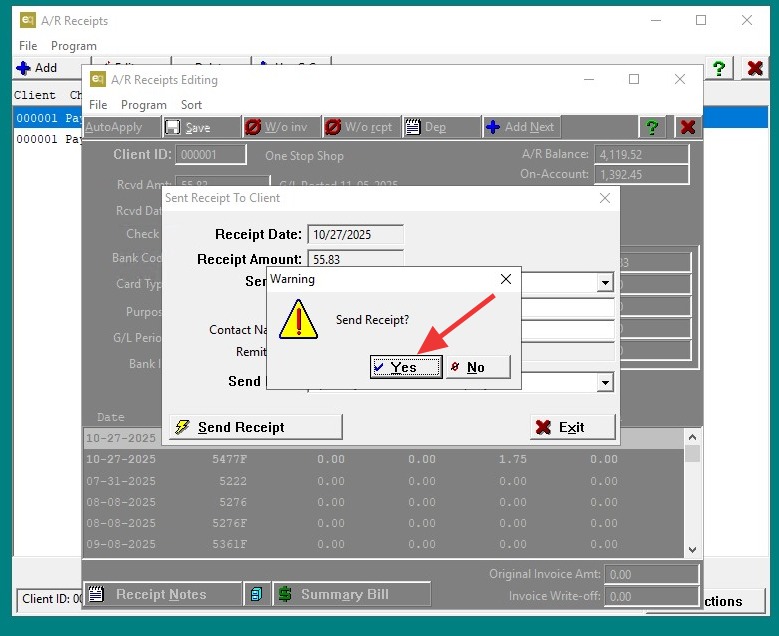
11. Click "Yes"
12. Screenshot: Shows the system-generated receipt sent through AR with no invoice detail only the total.
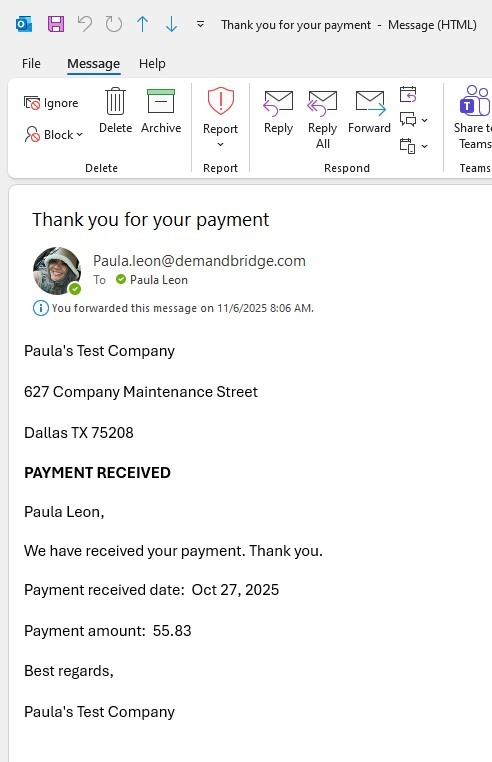
13. Screenshot: Shows the system-generated receipt sent through AR with invoice total and total amount.