EQD: DBPay - PaybyLink: How to Place a Deposit on a Purchase Order
The Pay By Link Deposit feature allows users to collect a partial deposit on a purchase order, such as 50% of the total order amount, by sending the client a secure payment link. Once the order is invoiced, the remaining balance can later be collected through AR invoicing using the same active payment link, providing a streamlined payment experience for both the user and the client.
Alert: Note: This process was created in a test environment. The information selected is for training purposes only and will not match the data you will use in your company's system.
Payment Link Initialization
1. ### Create the Purchase Order
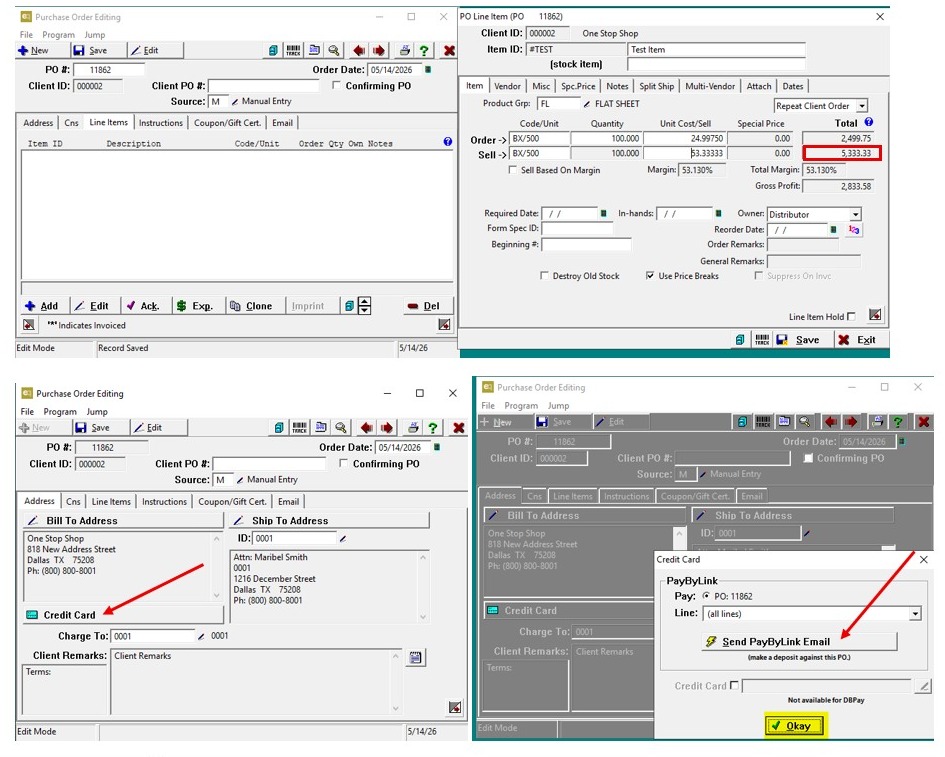
- Navigate to Purchase Order Editing.
- Create a new purchase order.
Open the Credit Card Payment Option
- Go to the Address tab.
- Click on Credit Card.
- A dialog box titled Send Pay By Link Email will appear.
- Click OK.
2. ### Configure the Pay By Link Email
-
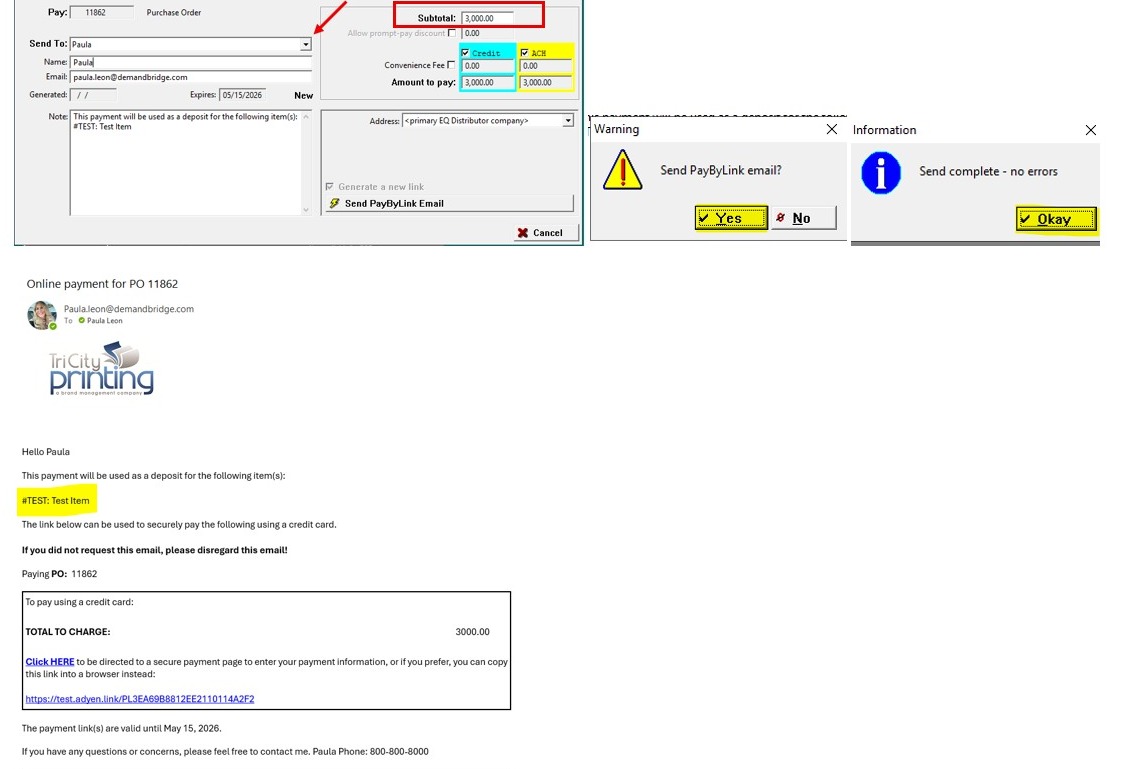
Another Send Pay By Link Email window will appear.
Under the Send To dropdown:
- Select an email from the client maintenance setup.
- Or select Custom to enter a different email address.
-
Under Notes, the purchase order item information will display automatically.
In the Subtotal field:
-
Enter the dollar amount you want to request as the deposit.
Select the payment options:
- Credit Card
- ACH
- With or without convenience fee (depending on configuration)
-
-
Click Send Pay By Link Email.
A warning dialog box will appear:
- Send Pay By Link Email
-
Click Yes.
Another message will appear:
- Send Complete – No Errors
- Click OK.
Client Receives the Payment Link
- The client receives an email identifying the item requiring the deposit.
- The client can click either:
- The hyperlink
- Or the Click Here option
- Both options open the same payment portal.
Process and Receipt Verification
3. ### Client Submits the Deposit Payment
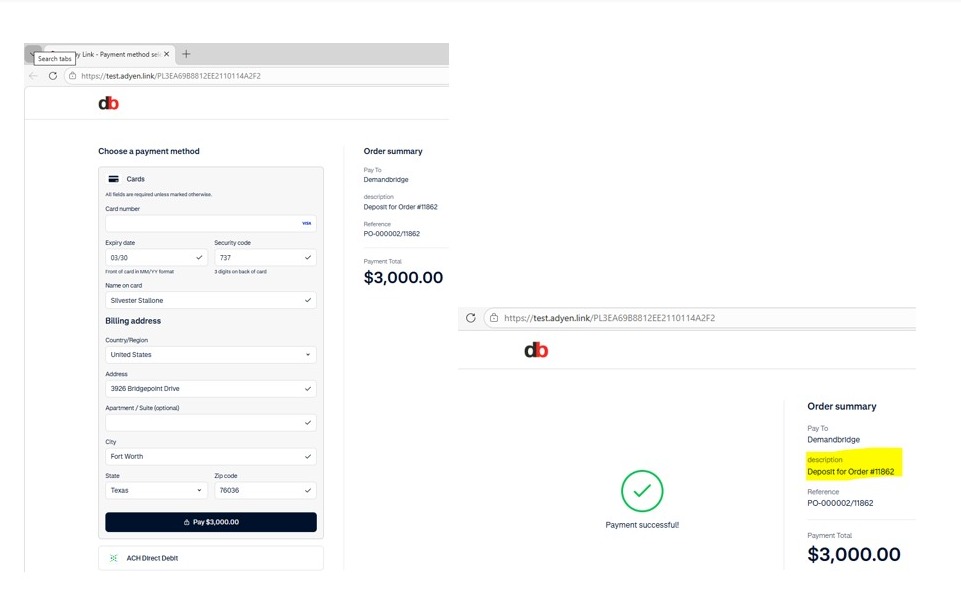
- The payment portal opens.
- The client enters their credit card information.
- The client clicks Pay.
- A confirmation message appears indicating:
- Payment Successful
Importing Pay By Link Payments into Quantum
4. ### Import the Payment
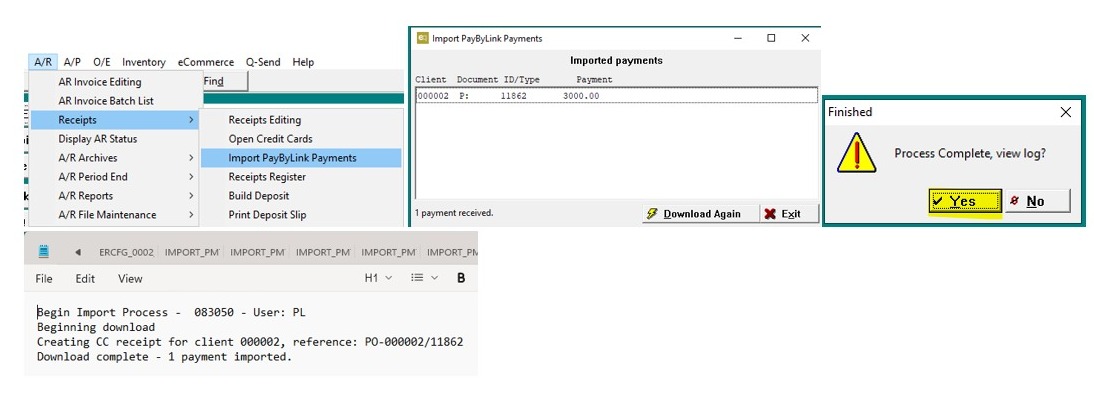
- Navigate to:
- AR
- Receipts
- Import Pay By Link Payments
- The import process begins automatically.
- Once completed, a notification appears:
- Finished – Process Complete – View Log
- Click Yes.
Review the Import Log
- A log file opens showing the actions completed by the system.
- Example:
- Receipt created for client 000002
- Reference:
- Client 000002
- PO Number 11862
Reviewing the Deposit Receipt
5. ### Open Receipts Editing
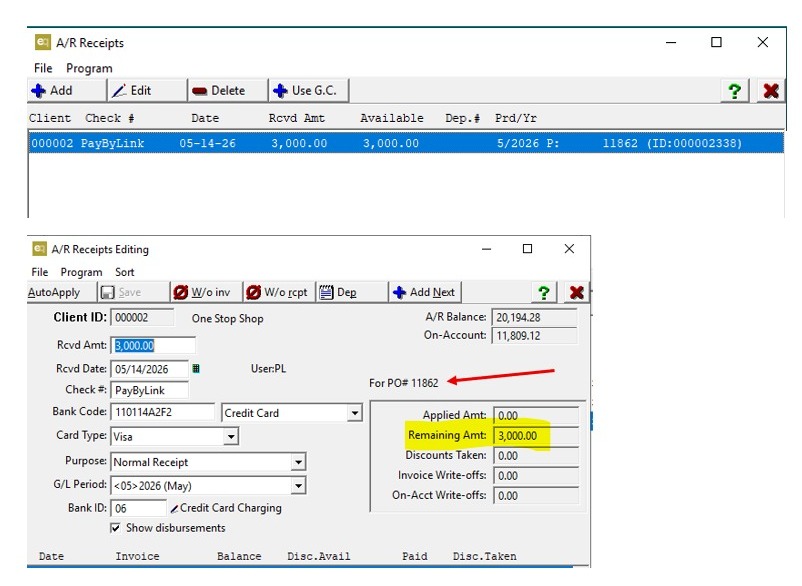
- Navigate to:
- AR Receipts Editing
- The receipt will display as Available until invoiced.
Review the Receipt
- Open the receipt.
- The receipt displays:
- Deposit for PO11862
- Remaining unapplied amount of $3,000
Viewing the Deposit on the Purchase Order
6. ### Review the PO Summary
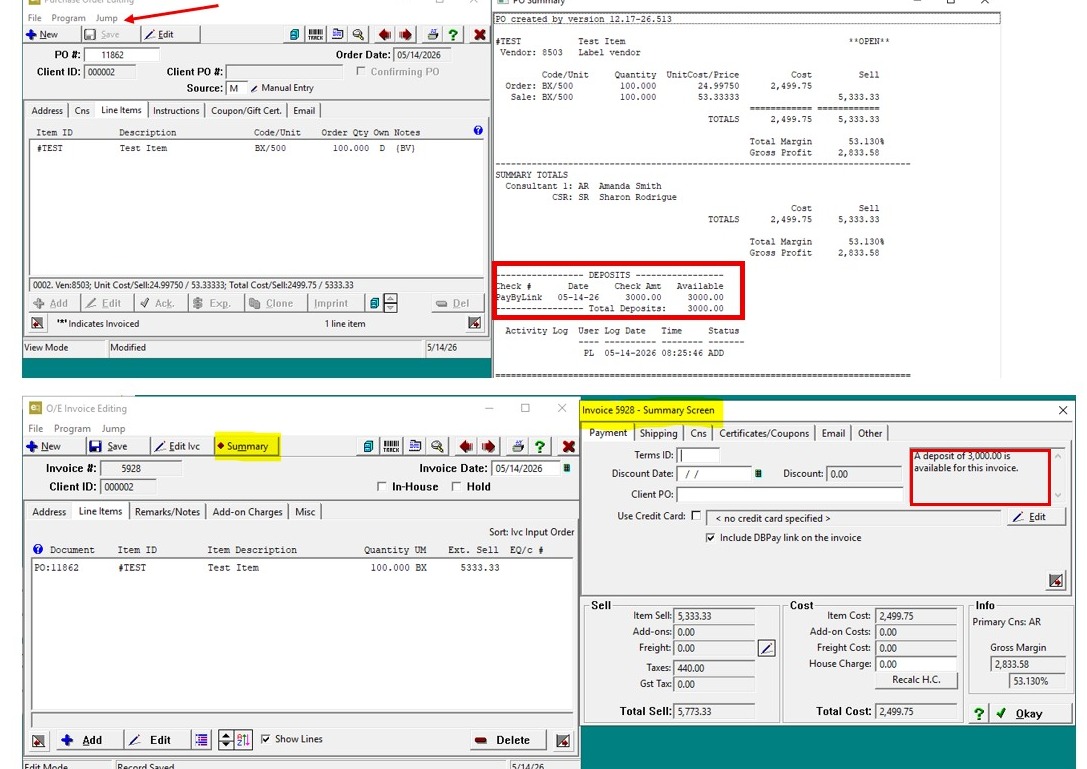
- Return to Purchase Order Editing.
- Open the purchase order.
- Go to:
- Jump
- PO Summary
- Scroll down to the Deposits section.
- The system displays:
- Deposit amount
- Deposit date
Review the Invoice Summary
- Go to:
- Invoice
- Edit
- Summary
- The summary shows:
- A deposit of $3,000 available for the invoice.
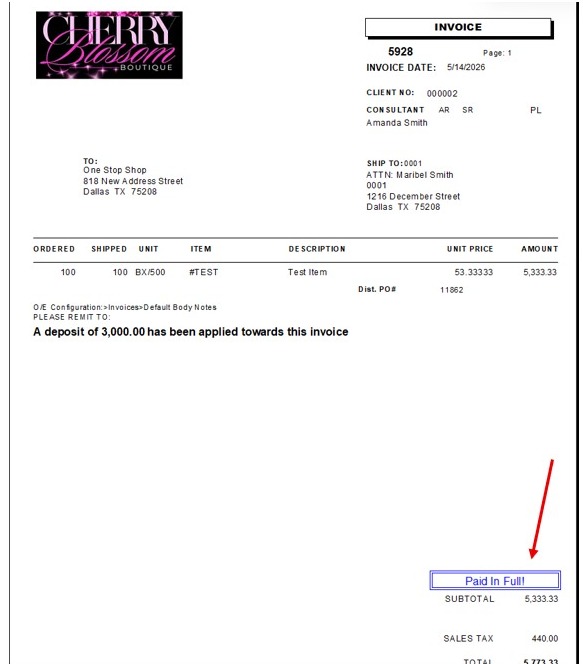
7. ### Review the Invoice
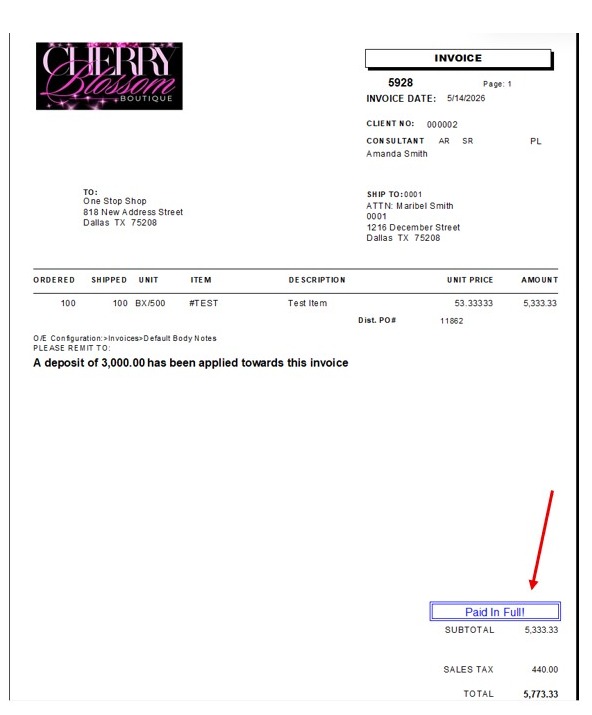
- Open the invoice.
- The invoice displays:
- Deposit of $3,000 applied toward the invoice.
Posting the Invoice
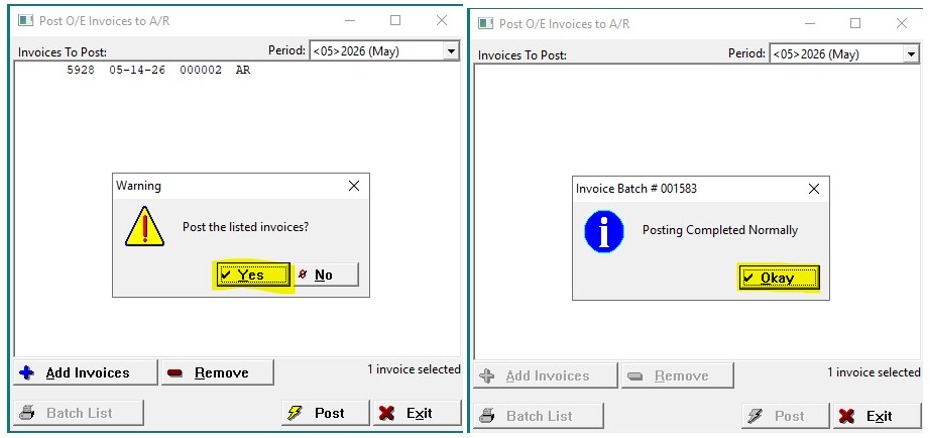
8. ### Post the Invoice
- Navigate to:
- OE
- Invoices
- Invoice Posting
- Enter the invoice number to post.
- A dialog box appears:
- Post the Listed Invoices
- Click Yes.
- Another message appears:
- Posting Complete Normally
- Click OK.
Reviewing the Applied Deposit
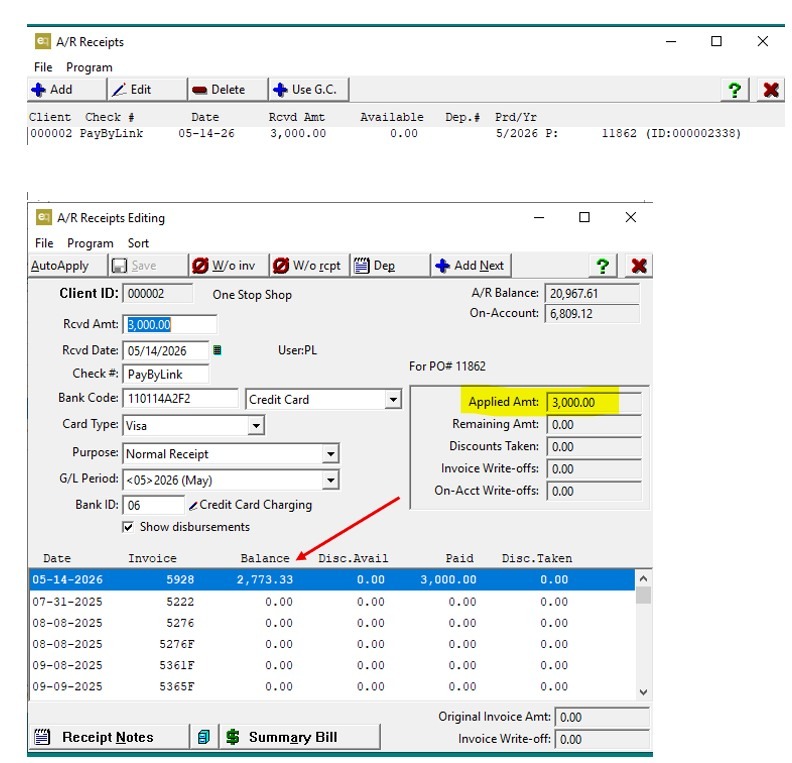
9. ### Verify the Receipt Application
- Return to Receipts Editing.
- The receipt balance is no longer fully available.
- Open the receipt.
- The receipt now shows:
- $3,000 applied to the purchase order
- Remaining balance due of $2,773.33
Sending a New Pay By Link for Remaining Balance
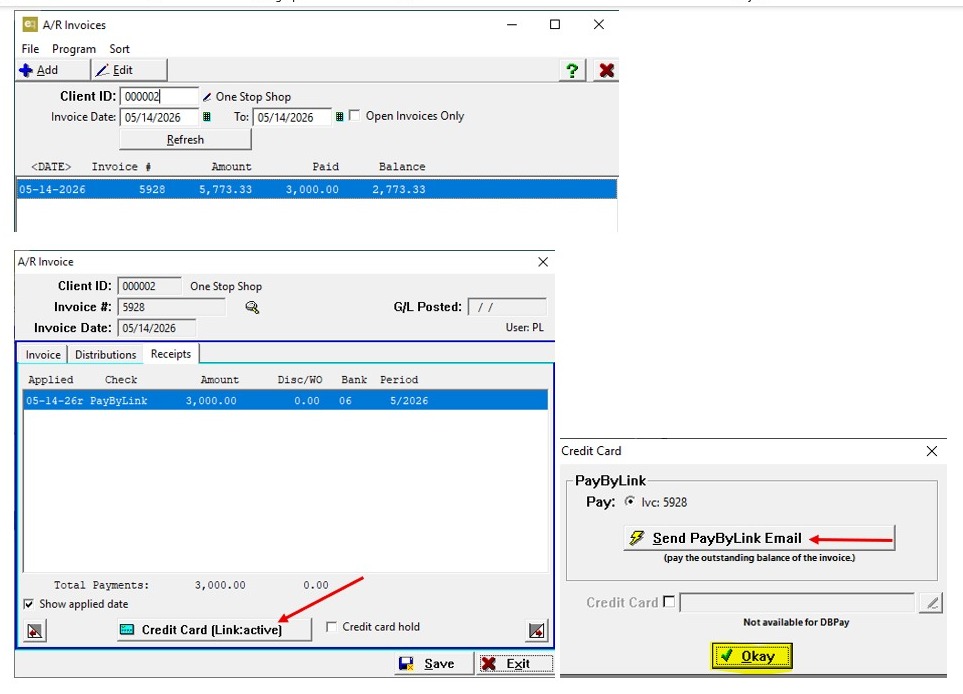
10. ### Open AR Invoice Editing
- Navigate to:
- AR Invoice Editing
- Select the client.
- Open the invoice with the remaining balance due.
Review Link Status
- Go to Credit Cards.
- The system displays:
- Link Active Status
- This indicates the client can use the same payment link to pay the remaining balance.
Resend the Pay By Link Email
- Click Credit Card.
- Click Send Pay By Link Email.
- Click OK.
11. ### Configure the Remaining Balance Email
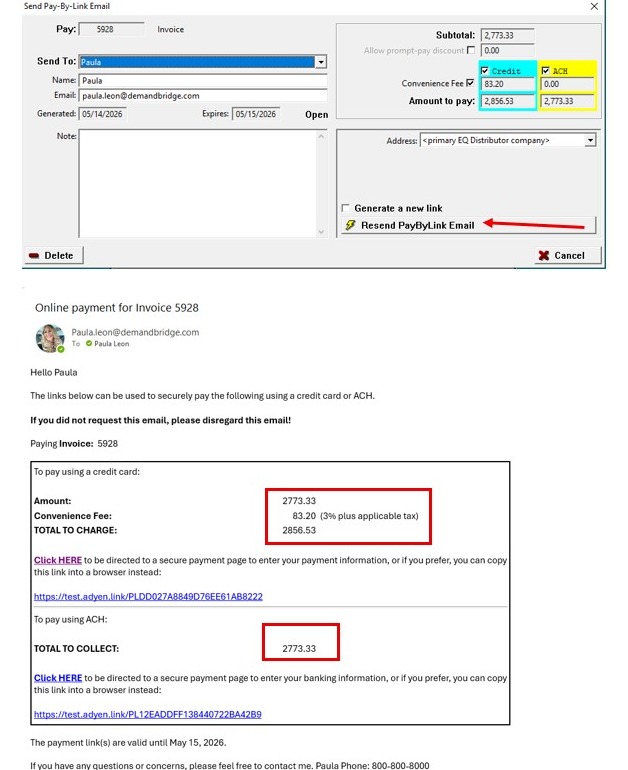
- In the Send Pay By Link Email window:
- Select the email from the client setup
- Or choose Custom from the Send To dropdown
- The Subtotal field is no longer editable because it reflects the remaining balance due.
- Click Resend Pay By Link Email.
Client Pays Remaining Balance
- The client receives another payment email.
- Available payment methods may include:
- Credit Card
- ACH
- Convenience fee options (depending on configuration)
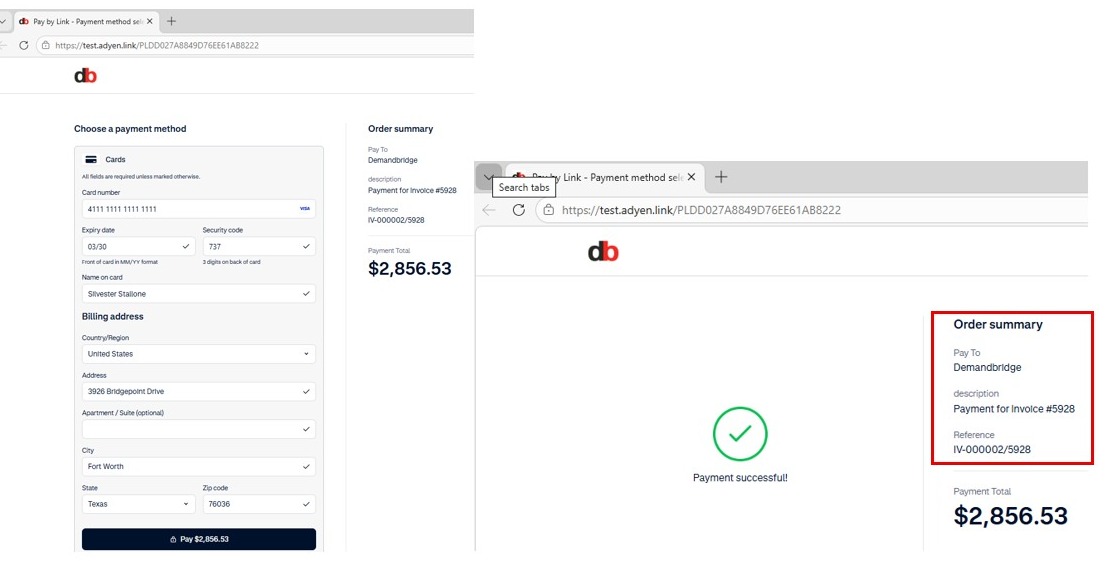
12. The client opens the payment link.
- The payment portal appears.
- The client enters payment information.
- The client clicks Pay Amount.
- A confirmation message appears:
- Payment Successful
Importing the Final Payment
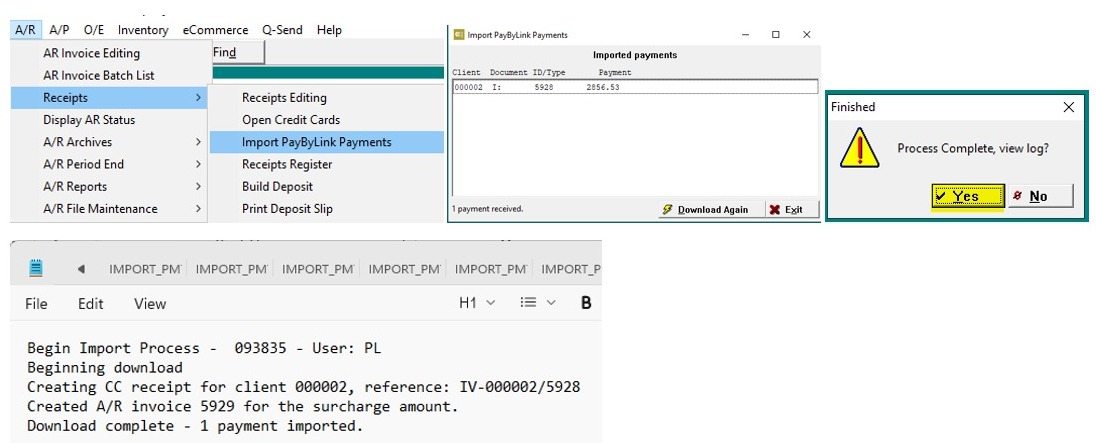
13. ### Import the Final Payment
- Return to:
- AR Receipts Import Pay By Links
- The payment imports automatically.
- A message appears:
- Process Complete – View Log
- Select:
- Yes to review the log
- Or No to close the message
Review the Final Receipt Log
14. The log displays confirmation that the receipt was successfully created for the final payment.
Verify the Invoice is Paid in Full
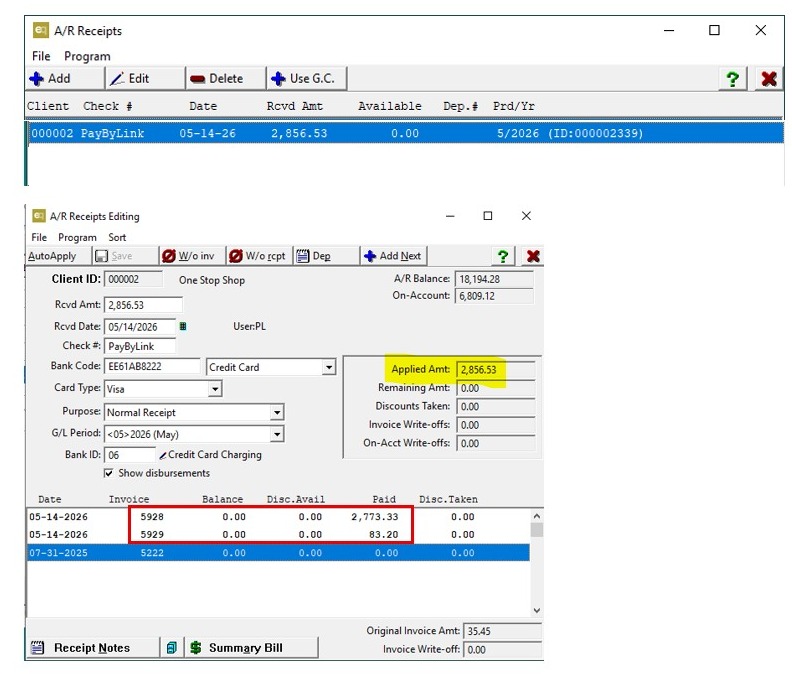
15. - Navigate back to AR Invoice Editing.
- Open the invoice for the client.
- The invoice status will reflect that it has been paid in full.