Valpay Virtual Terminal – Steps for Processing a Payment
Tip: Log in to the Valpay Portal https://reporting.valpay.com/
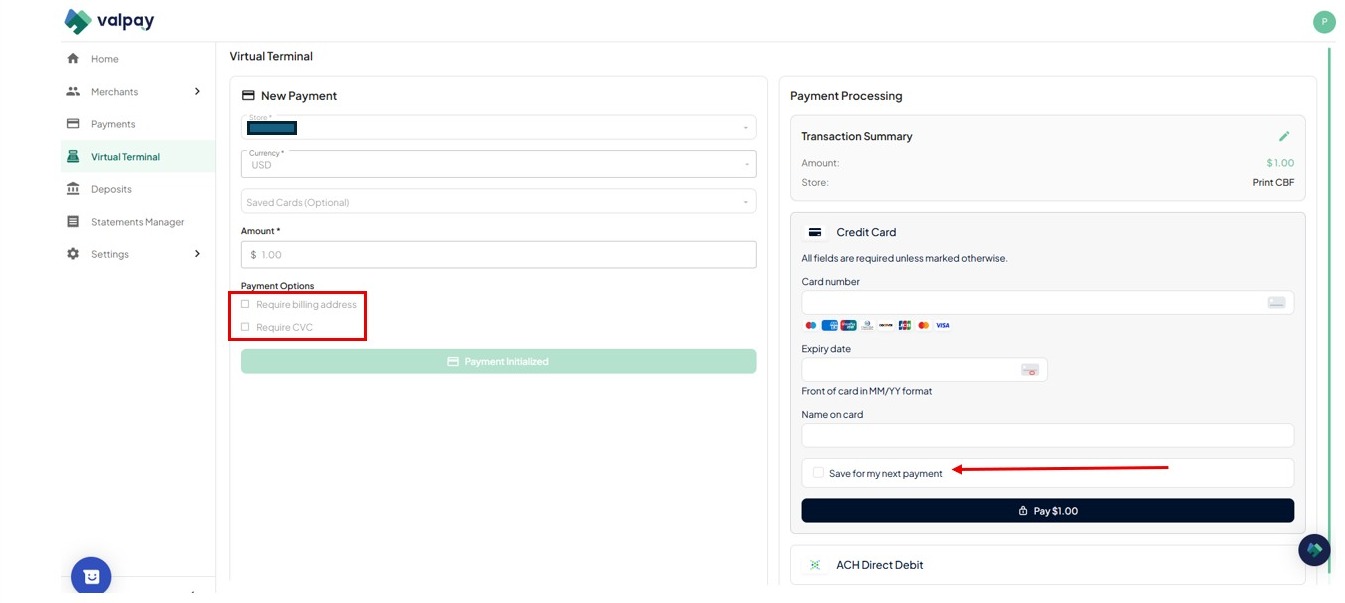
1. - Navigate to Virtual Terminal (you must have the correct access enabled).
-
Enter the currency.
-
(Optional) Use the Saved Cards dropdown:
-
If stored payment information exists, select the card and apply the payment.
-
If no stored payment information exists, skip this step (you can save the card on the next screen).
-
-
Review Payment Options:
-
You may check Require Billing Address and Require CVC.
-
If you do not have one or both, uncheck the option(s) to allow payment entry without them.
-
-
Click Payment Initialized.
-
Enter the card details.
- Optionally select Save for my next payment to store the card for future use.
-
Click Pay to complete the transaction.
Alert: ## Important Notes
-
No system integration
The payment processing tool is not integrated with the accounting/ERP system. Payments must be processed in the payment tool first, and the receipt must then be manually entered into the accounting system. -
How to send a receipt to the client
The payment tool in Valpay does not provide an option to send receipts directly to clients. Receipts must be sent through the accounting system.-
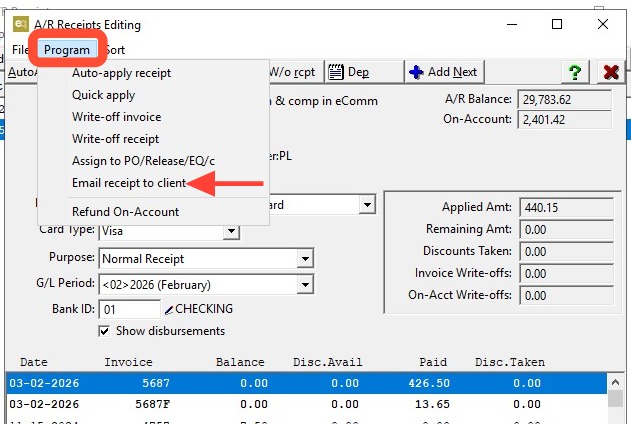
Enter the receipt in the accounting system and apply the payment.
-
Go to Program>email the receipt to the client.
-
2. Go to Program>email the receipt to the client.