
Voiding a Check or ACH in Quantum
Alert: Note: This process was created in a test environment. The information selected is for training purposes only and will not match the data you will use in your company's system.
Tip Scenario:
You issued an ACH (or check) payment for an A/P invoice, but:
-
The payment never cleared the bank, and
-
The original invoice was entered with the wrong dollar amount
You need to void the payment and properly correct the invoice in Quantum.
Why this process is necessary:
-
The ACH/check was marked as paid in the system, but no funds actually left the bank.
-
The original invoice amount was incorrect, and since it’s already posted, it cannot be edited in Quantum.
-
To correct this cleanly and maintain accurate records, you’ll reverse the payment, clear the invoice from AP, and re-enter the corrected invoice.
Tip: ### What Posting Period to Use:
> Perform all actions in the current open posting period (the period in which the issue was identified).
Note: The appropriate posting period may vary depending on the reason for voiding the check. Be sure to evaluate the scenario before proceeding.
Alert: Verify the posting period of voided checks:
- AP > Maintenance > Configurations > Misc Setup
a. Post Voided Checks > choose option:
i. Current Period: check has been lost in mail, etc.
ii. Original Period: check issued in error in earlier or future period
b. Save > Exit
Before Step 1: Locate the Check/ACH Number
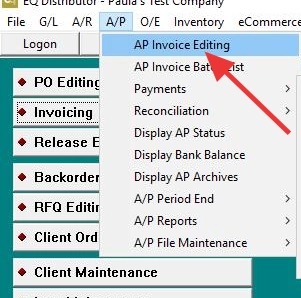
1. Navigate to AP > Invoice Editing.
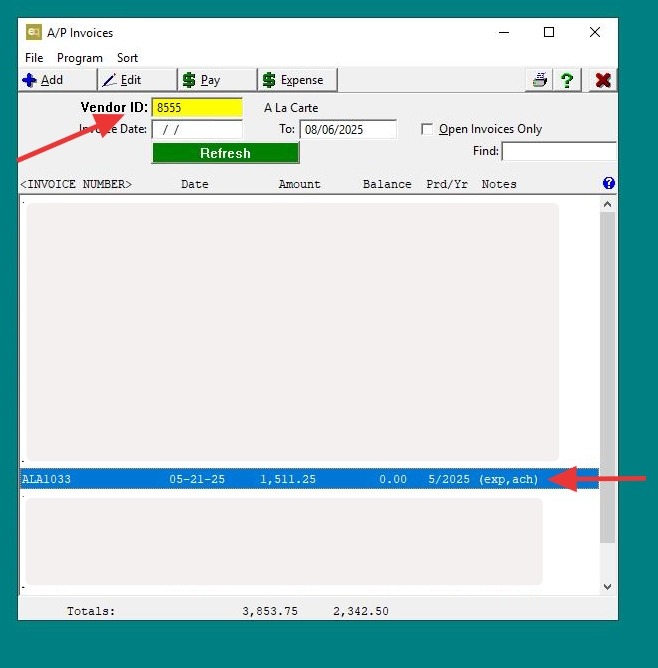
2. - Pull up the vendor tied to the invoice you need to void.
- Locate and open the invoice associated with the incorrect payment.
3. - Click on the Payment tab.
- Note the check number listed there — this is what you’ll need for the void process.
- Exit the screen once you’ve retrieved the number.
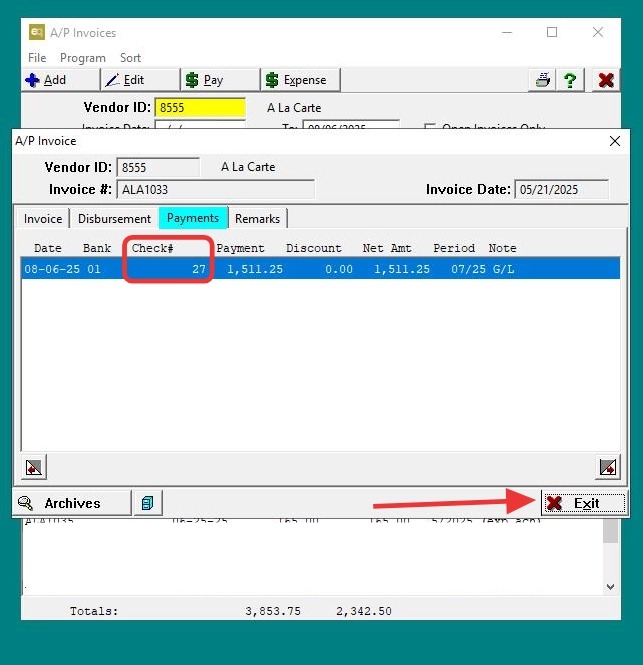
Tip: 💡 Why: This ensures you have the correct check or ACH reference before starting the void process.
Steps to Void a check
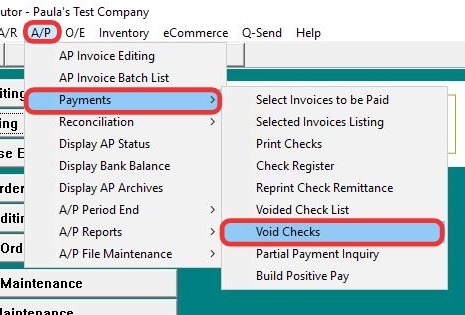
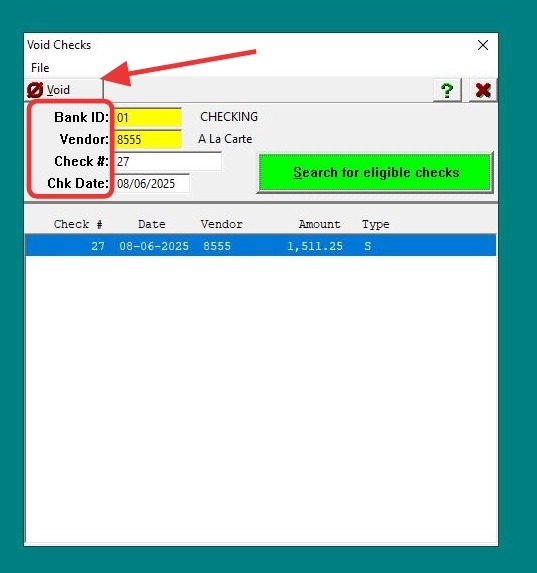
4. Go to AP > Payments > Void Checks
5. - Enter the bank ID, check number you just retrieved to locate the payment.
- Enter vendor name and payment date.
- Click on Search for Eligible Checks.
- Void the ACH/check payment
6. Click "Yes"
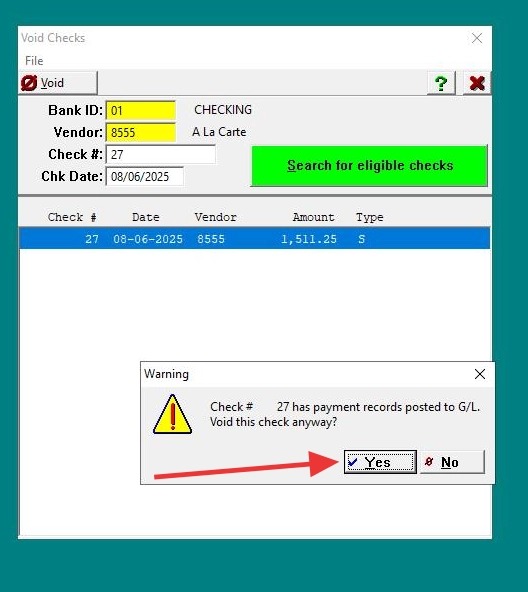
Tip: 💡 Why: This returns the funds to the GL bank account and marks the invoice as unpaid.
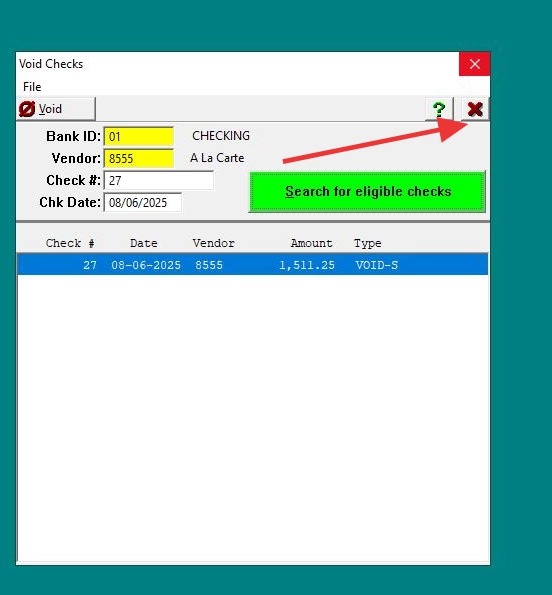
7. Click "Exit"
Create a Credit Memo
8. Go to: AP > Invoices > Add
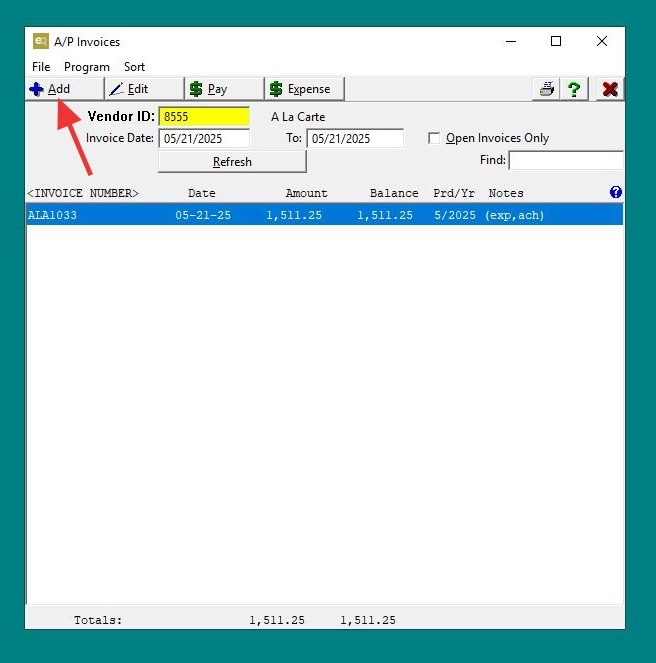
9. Use the same invoice number followed by REV or CR and enter the same amount as the incorrect invoice, use the same invoice date so they can be side by side when paying.
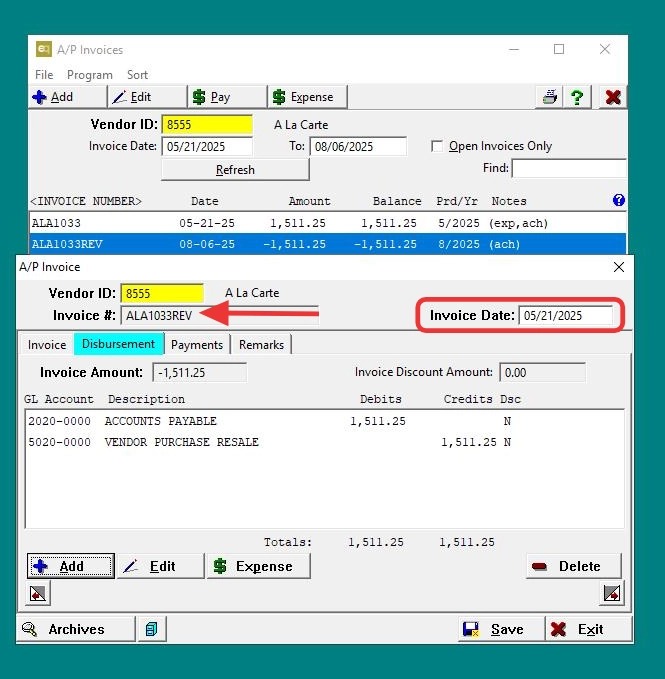
Tip: Why: Since posted invoices cannot be changed, the credit memo offsets the invoice so it can be cleared out properly.
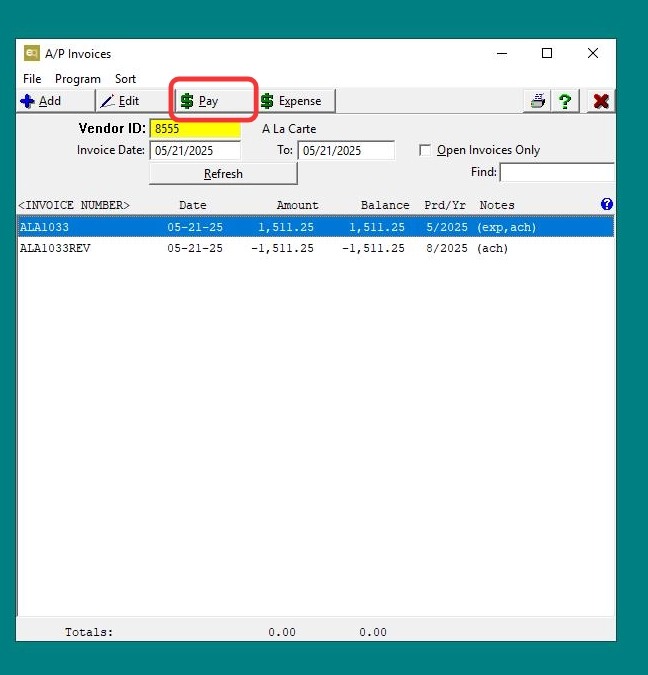
10. Click "Pay"
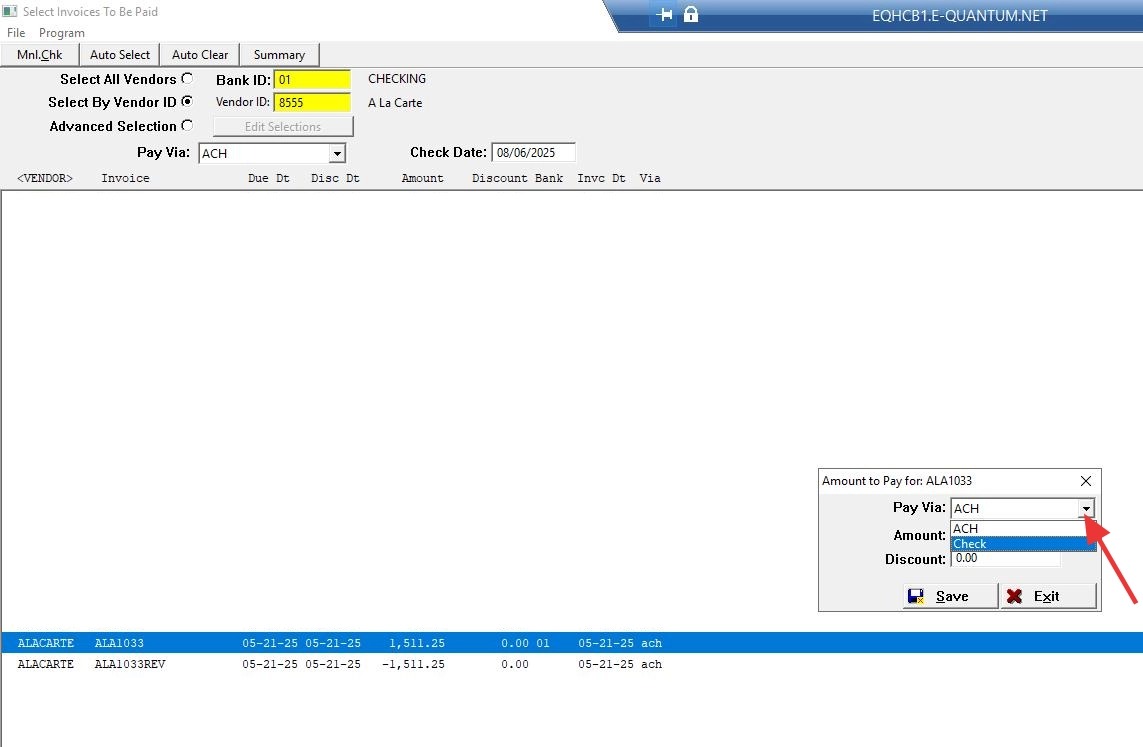
11. Locate Invoice to Change the Pay Via Method to check
12. Locate credit to Change the Pay Via Method to check
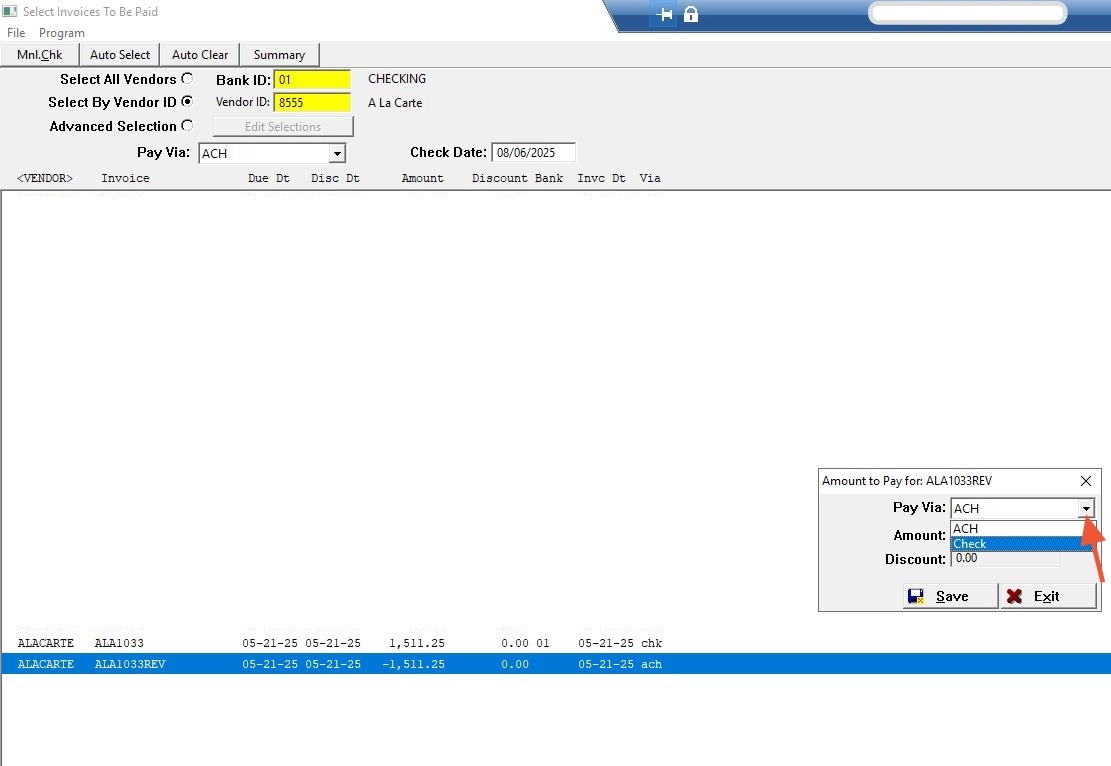
13. Select both the credit memo and the original invoice to clear them together.
Click "Select" then "Exit"
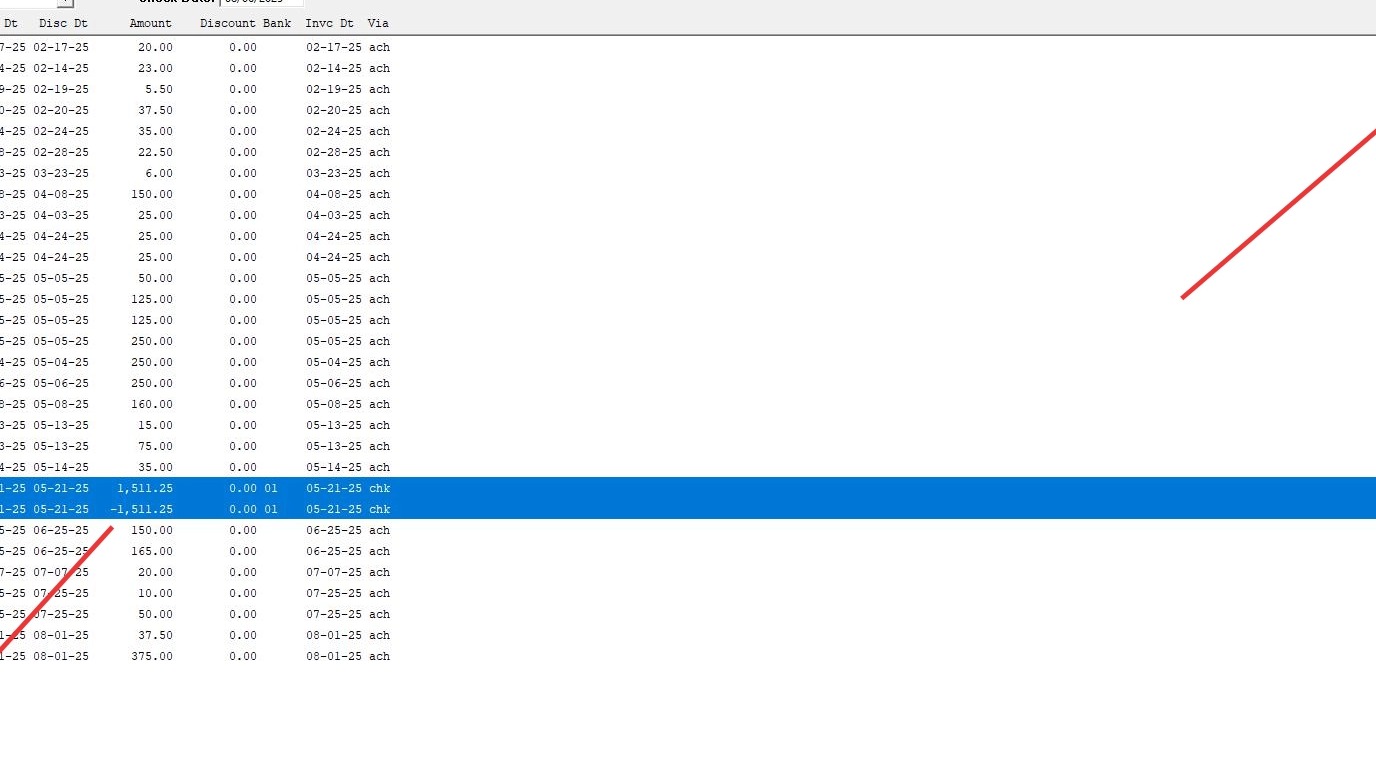
Tip: 💡 Why: This clears the incorrect invoice from open payables.
14. Click "Exit"
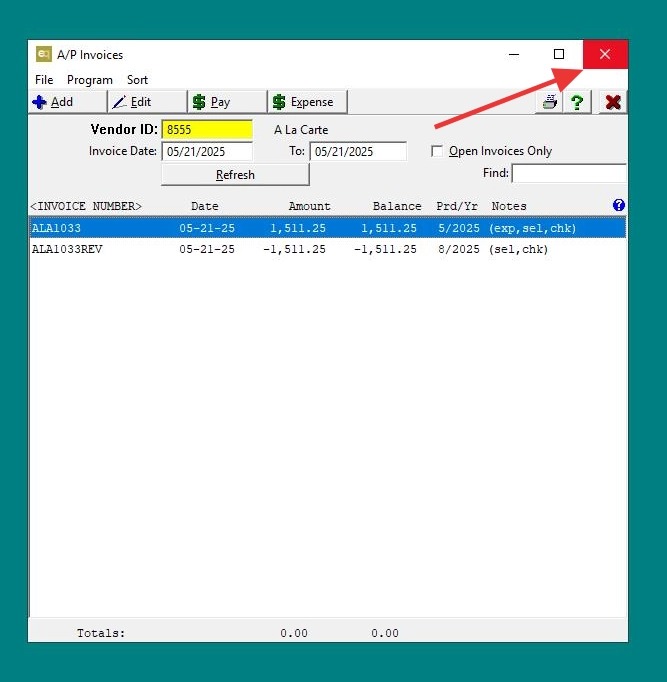
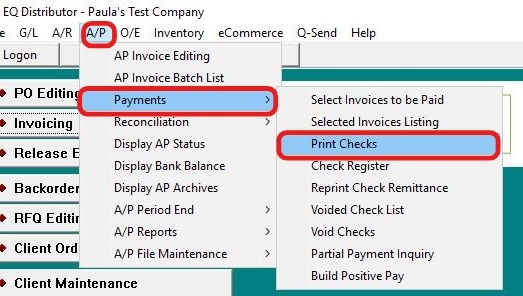
15. Click "Print Checks"
16. Click "Preview"
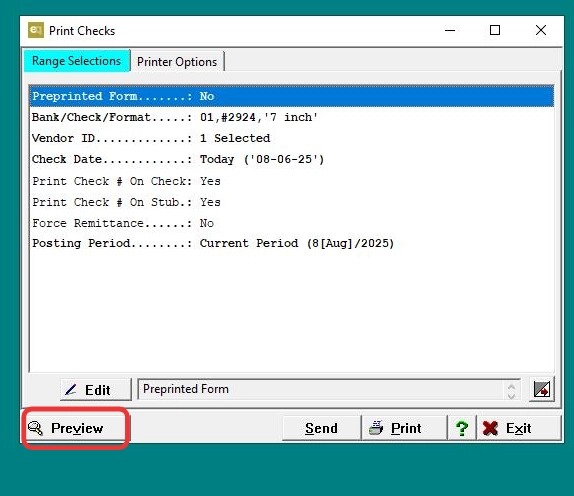
17. Note: You may enter any check number or use an actual check number and print it on plain paper, since the check will not be mailed or distributed. Click "Okay" to continue.
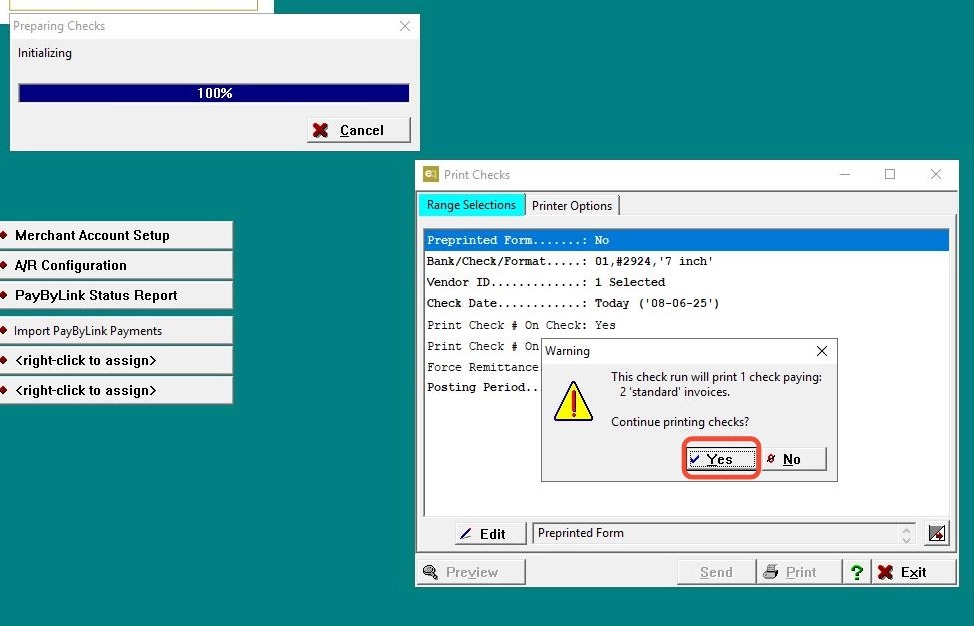
18. Click "Exit"
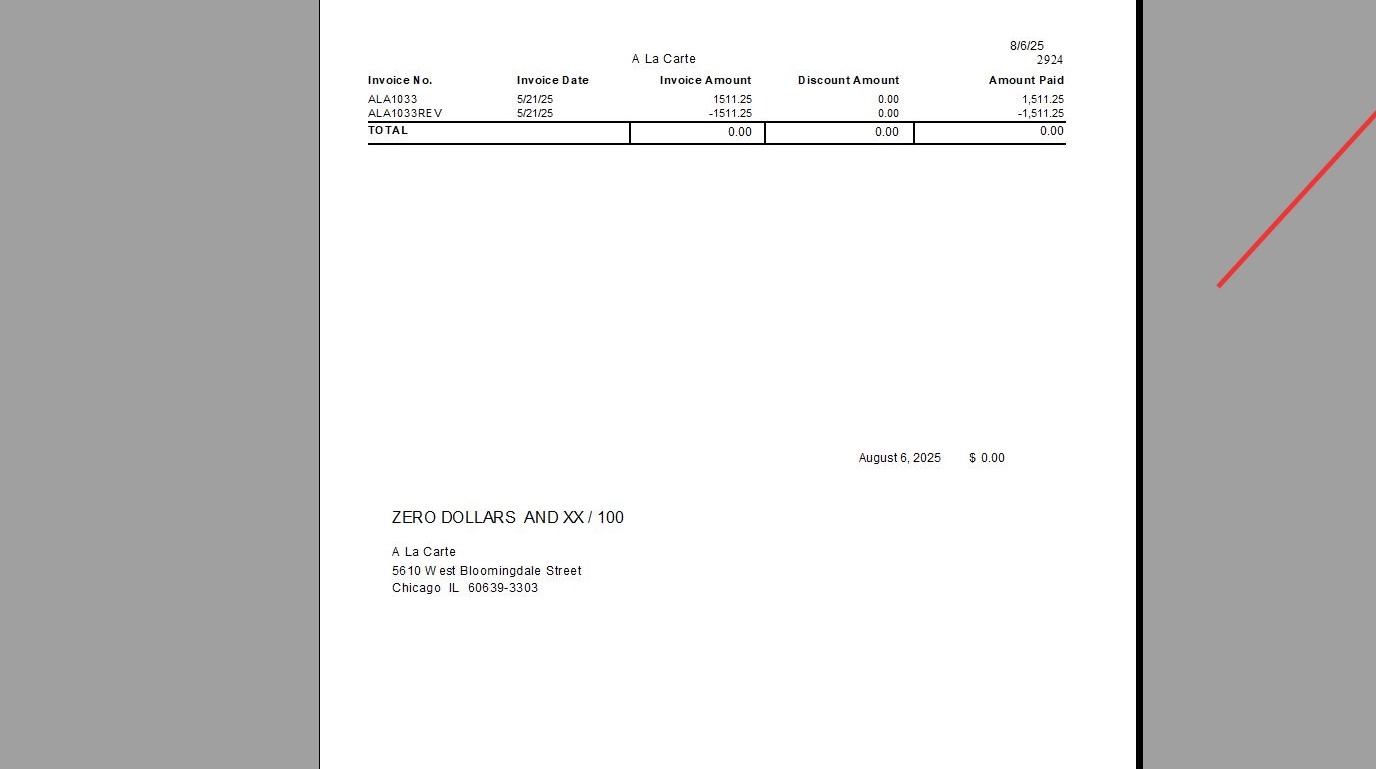
Alert: You have completed the process of voiding an ACH payment and issuing a credit against it. The first step covered how to void the payment, and the next step explains how to enter the new, corrected invoice.
Tip: ### Re-enter the Corrected Invoice
-
Go to:
AP > Invoices > Enter Invoice -
Enter the correct dollar amount and other invoice details.
-
For the invoice number, use the same number as the original followed by "-NEW" (or any other suffix you prefer) to distinguish it.
-
Post the invoice.
> 🛠️ Why: This allows the system to reflect the correct vendor charge and prepares it for proper payment.
👉 After posting, follow the same process you normally use when paying invoices to issue payment for the corrected invoice.