EQD: Shipping Notices
This document provides detailed instructions on using EQD Shipping Notices feature, including user security settings, client maintenance, and generating shipping notices.
Tip: The EQD Shipping Notices feature sends clients shipment details, including:
- Tracking numbers
- Ship dates
When tracking numbers are entered or imported, EQD automatically selects the Send Ship Notice option for purchase orders and warehouse releases.
Shipping notices can be sent:
- Manually through Send Ship Notices
- Automatically through the EQD Report Scheduler
1. User Security
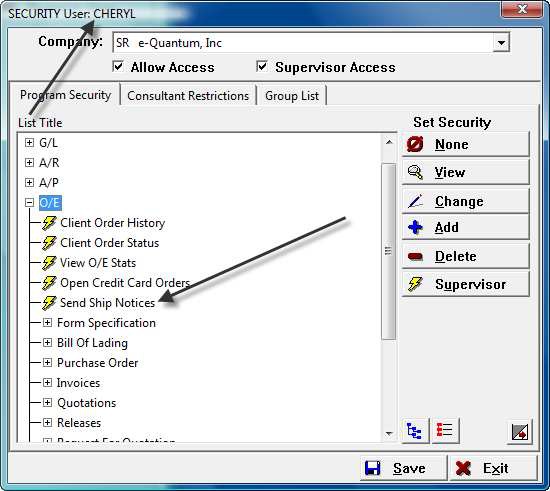
A user’s ability to send Shipping Notices is determined in User Security. To set user security go to File>Security. Select the user or the group, click
2. OE Configuration
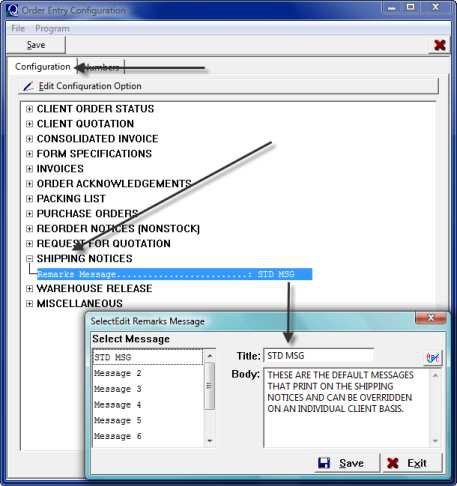
You can create up to nine default messages for shipping notices.
- Go to O/E > O/E File Maintenance > O/E Configuration.
- Open Shipping Notices.
- Edit Remarks Message.
- Select a message from the Select Message list.
- Enter a Title and message in the Body field.
- Click Save.
3. ### Client Maintenance
The EQD Shipping Notice process can be disabled for individual clients through Client Maintenance. You can also:
- Define client-specific shipping notice remarks.
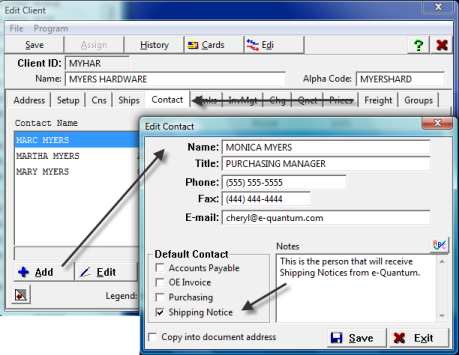
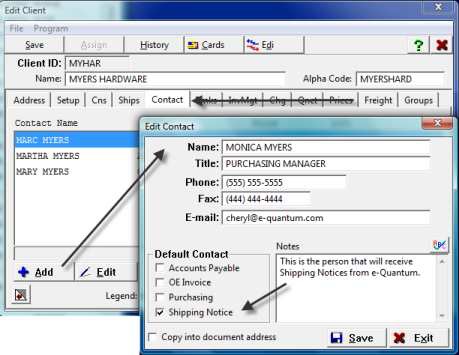
- Add a shipping notice contact from the Contacts tab.
4. ### Shipping Notice Contact
- Open Client Maintenance and edit the client.
- Select the Contacts tab.
- Click Add to enter the shipping notice recipient.
5. ### Suppressing Shipping Notices
To prevent a client from receiving shipping notices, you can:
- Select No when prompted by EQD.
- Disable shipping notices for the client to prevent future prompts.
To disable shipping notices, go to:
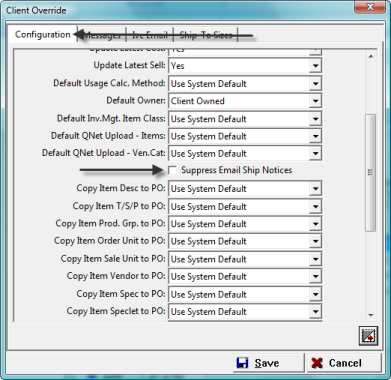
6. On the Configuration tab select Suppress Email Ship Notices.
7. ### Client-Specific Remarks
To override the default remarks for a client:
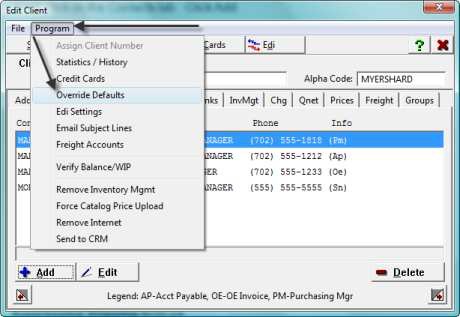
- Open Client Maintenance and edit the client.
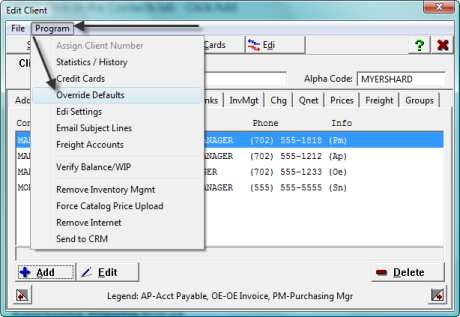
- Select the Program menu.
- Click Override Defaults.
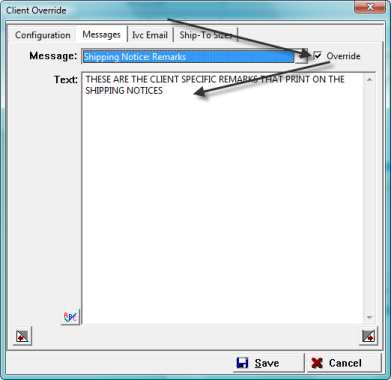
8. On the Messages tab select Shipping Notice Remarks from the Messages dropdown list.
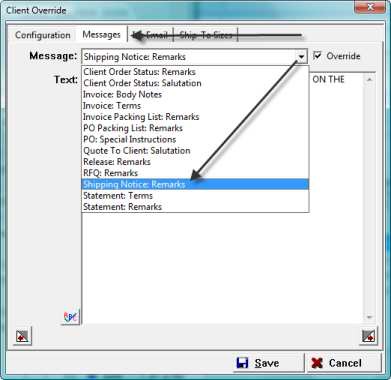
9. Select Override to activate the Text field. In the Text field enter the remark you want to print for this client. Click Save.
10. EQC
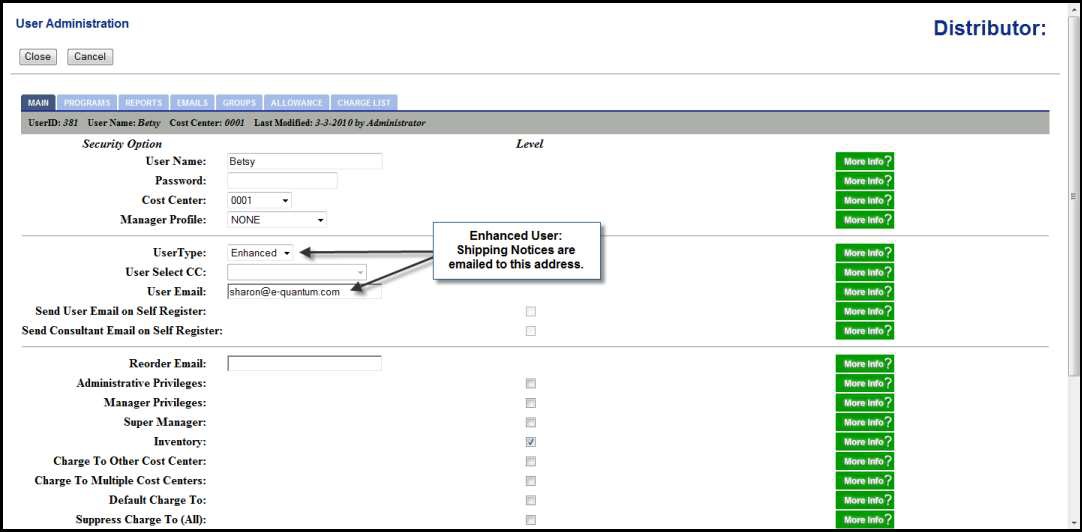
When a Purchase Order or Warehouse Release originates from EQC the Shipping Notice is emailed to the ordering user’s email address.
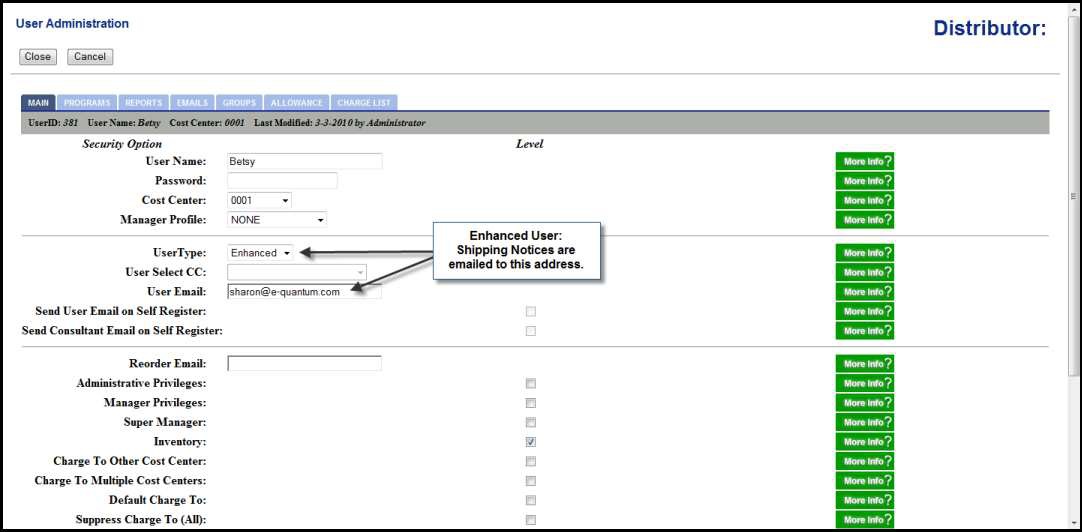
11. Enhanced User
An Enhanced user’s email address is entered on the Main tab in EQC User Administration screen.
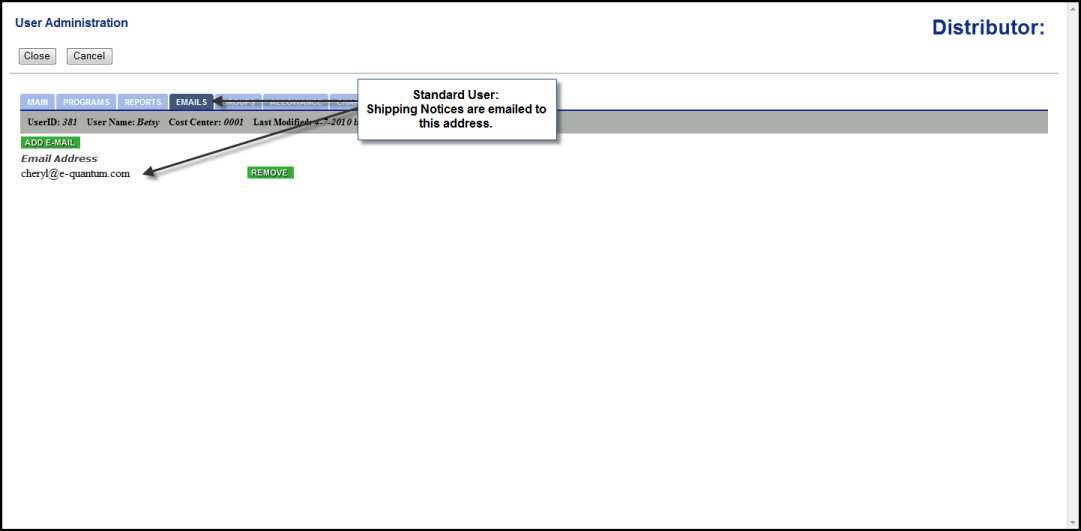
12. Standard User
A Standard user’s email address is entered on the Emails tab in EQC User Administration screen.
13. Warehouse Releases
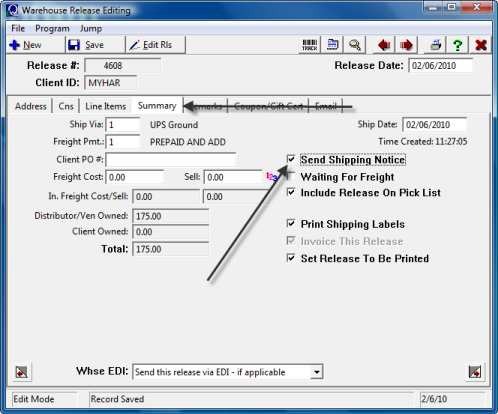
The Send Shipping Notice option, on the Summary tab, is automatically selected when tracking numbers are either entered or downloaded.
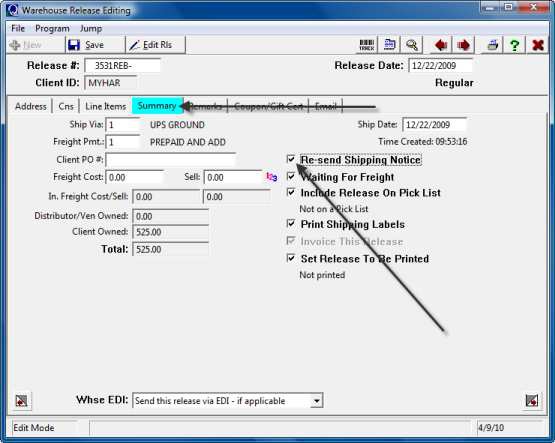
14. After a shipping notice is emailed, EQD automatically changes Send Shipping Notice to Re-Send Shipping Notice to prevent duplicate emails.
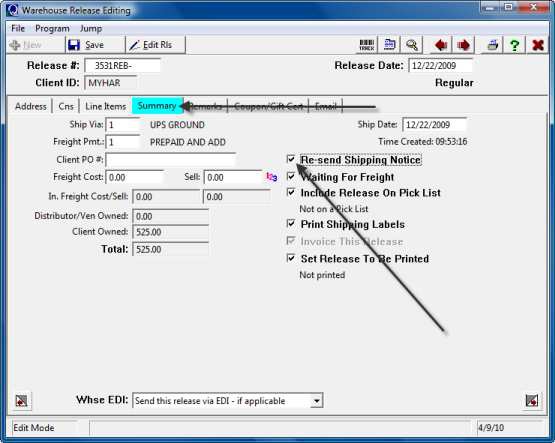
15. ### Re-Sending a Shipping Notice
- Edit the Warehouse Release.
- Open the Summary tab.
- Select Re-Send Shipping Notice.
The notice will be added to the shipping notice queue and made available for email.
16. ### Purchase Orders
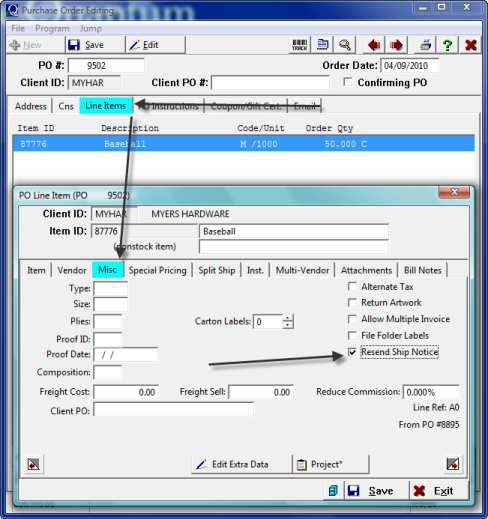
EQD selects Send Shipping Notice on the PO line item’s Misc tab when:
- Tracking numbers are entered or downloaded.
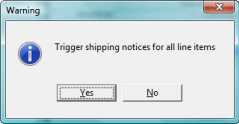
- Yes is selected when prompted to trigger shipping notices for all line items.
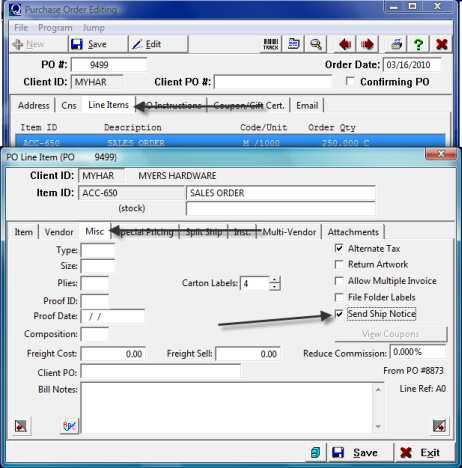
17. After the shipping notice is emailed, EQD changes Send Shipping Notice to Re-Send Shipping Notice to prevent duplicate emails.
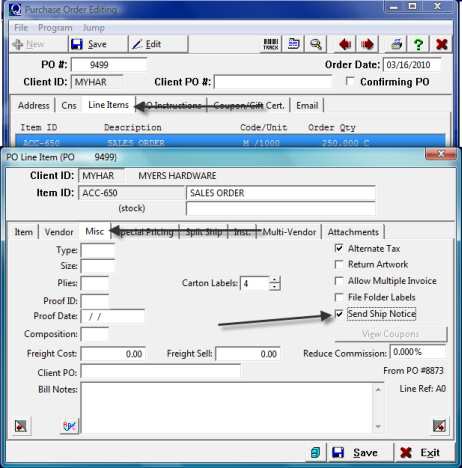
18. ### Re-Sending a Shipping Notice
- Edit the Purchase Order.
- Edit the line item.
- Open the Misc tab.
- Select Re-Send Shipping Notice.
The notice will be added to the shipping notice queue and made available for email again.
19. ### Generating Shipping Notices
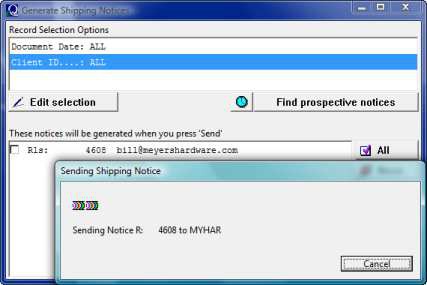
- Go to O/E > Send Ship Notices.
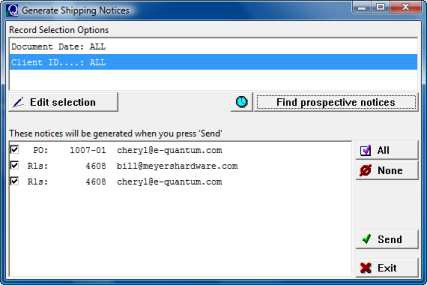
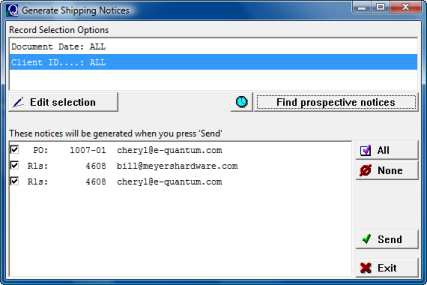
20. Edit Selection:
- Edit the document date or Client ID selection criteria.
- Find Prospective Notices: Display available shipping notices.
- All: Select all listed shipping notices.
- None: Clear all selected shipping notices.
- Send: Send the selected shipping notices.
21.
22. Select the Document Date and Client ID or accept the default of ALL. Click Find prospective notices. Select the PO and/or Rls you want to send. Click Send.
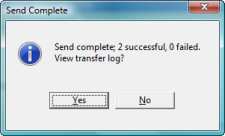
23. EQD displays the transmission status while sending the shipping notices. When complete, the Send Complete window allows you to view or print the transfer log.
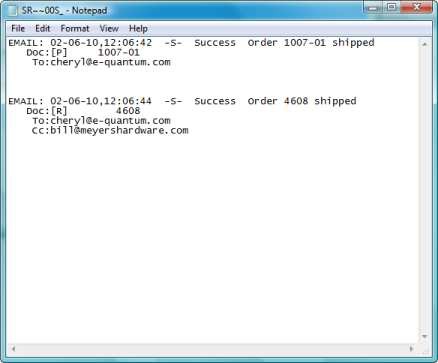
24. ### Transfer Log
Viewing or printing the Transfer Log is optional.
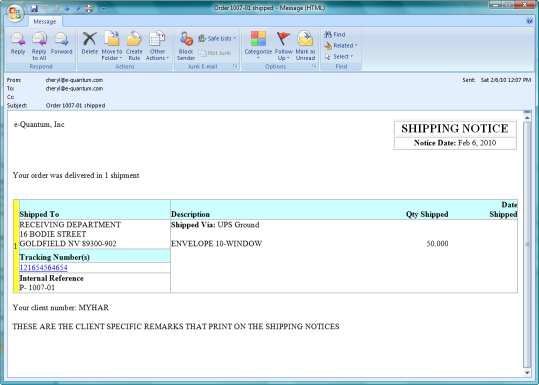
25. Shipping Notice
This is an example of the Shipping Notice that is sent to your clients.