EQC: Item Properties
e-Quantum's Item Properties feature enables the creation of user-specific item restrictions for EQ Commerce. First, properties are created and assigned to items. Users are then assigned one or more properties, and they can only view the items that match the allowed properties.
Properties can be applied to items through a dropdown selection or a Yes/No option. When using Yes/No, multiple properties can be combined to determine item availability for a user.
A common use case is assigning a property, such as a Division or Region, to an item. Users are assigned specific properties, allowing them to view only the items that match their assigned properties.
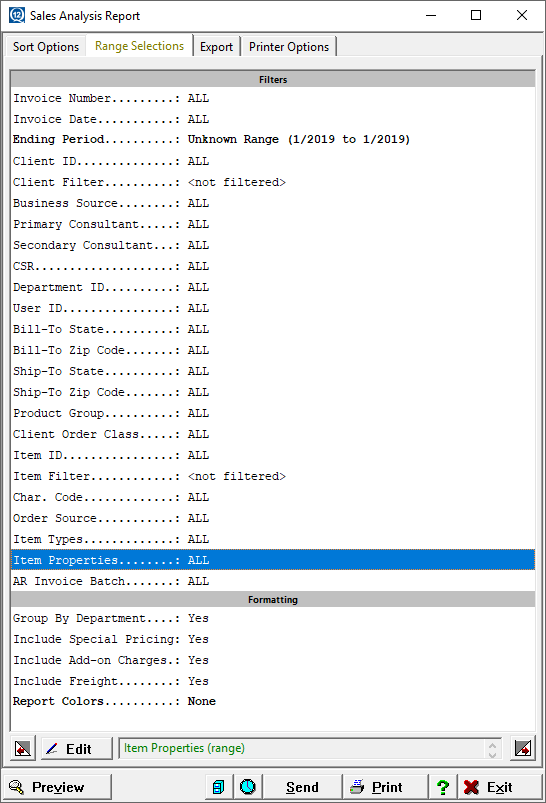
Additionally, item properties can be used as range selection options in Sales Analysis reports within e-Quantum.
Creating Item Properties
To set up Item Properties, go to Inventory > Maintenance > Inventory Configuration, and then click the Item Properties tab.
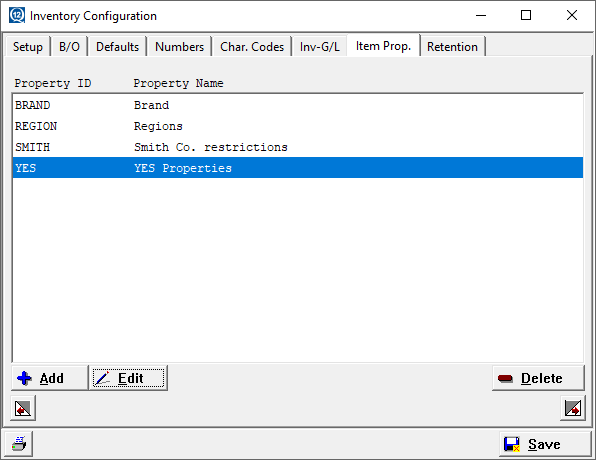
Click Add. Enter an ID for the property. The field accepts alphanumeric characters and can contain up to 15 characters. Enter the description of the property in the Name field. The ID and Name fields are for internal use.
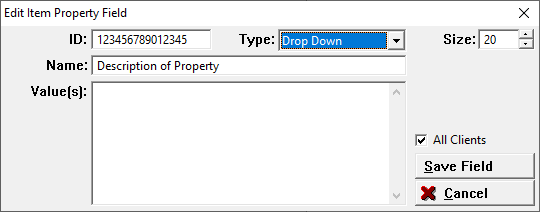
All Clients option allows the Item Property to be available for all clients. When using the property as a restriction, the property is activated on an individual client basis through Client Maintenance.
Property Type
Select the type. The type can be String, Drop Down, or a Yes/No checkbox. String allows entering text in an open text box on the item. This option is not used as a restriction on EQ/c. Drop Down allows entering selectable options, and the Yes/No Checkbox adds a checkbox in User Administration for allowing or not allowing the user to view items.
String: Used for a range selection on the Sales Analysis report. The field displays in the item and allows entering text. The report can include or exclude item with the selected text in the field.
- The Size field sets the length of the input field in Item Maintenance.
- Uppercase converts the entered text to uppercase.
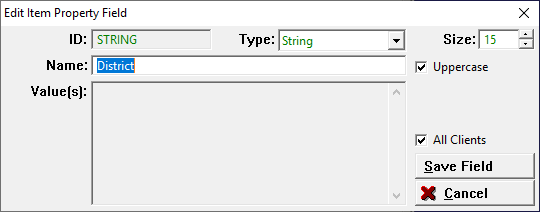
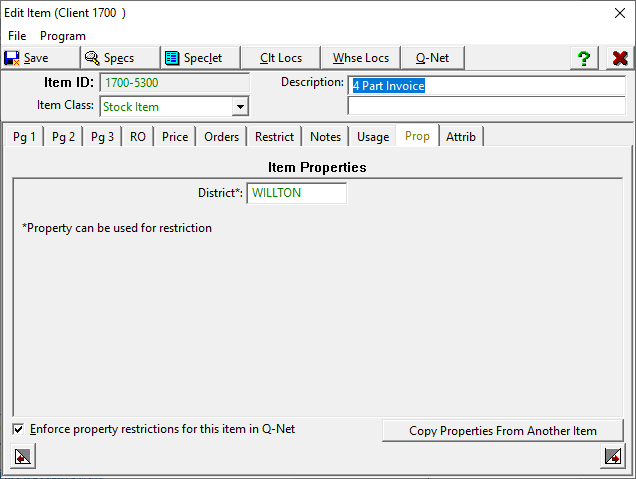
The field is displayed on the Prop tab in item maintenance. The property is entered into the open field.
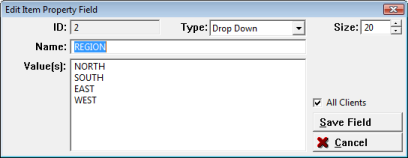
Drop Down: Allows you to create a list of values that can be selected in the item. The Drop Down field displays in the item, and the item is assigned one of the listed values.
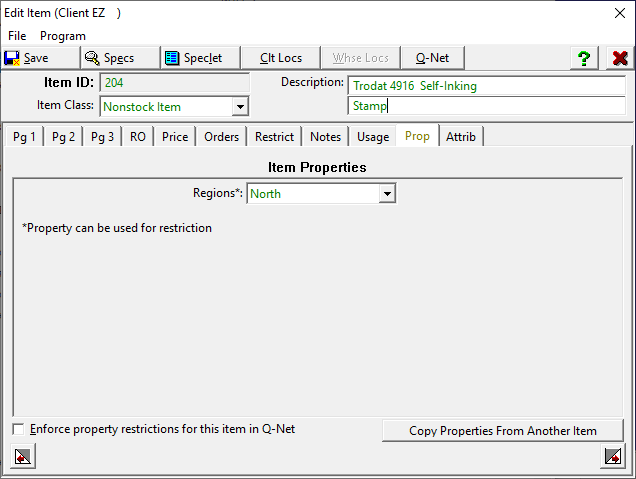
The values are displayed in a dropdown field in the Prop tab of Item Maintenance. The values are listed in the order they were entered in the property. If you use them as a restriction on EQ/c, select the box to enforce them as a restriction.
Yes/No Checkbox: This creates a drop-down in the Yes/No item. The value(s) field is not available.
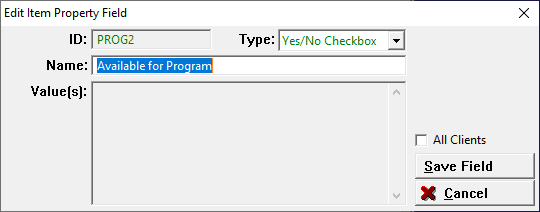
Item Maintenance displays the property as a selection of Yes or No. If multiple Yes/No checkboxes are used as restrictions, the user’s selection must match all entries for the item to be available to the user.
Client Maintenance
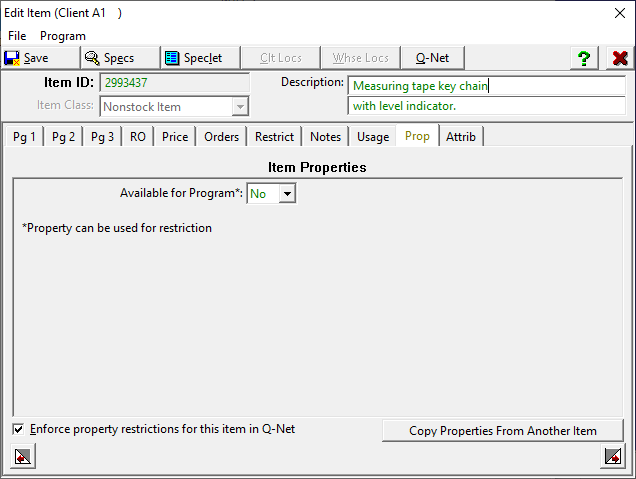
Item Properties can be enabled for all clients from the Edit Item Property Field screen in Inventory Configuration, or they can be set on a client-by-client basis through Overrides in Client Maintenance.
To enable an individual client, go to Client Maintenance, edit the client, click the Overrides button, and then select the Properties tab.
Properties tab
The Properties tab is used to select and/or override item properties applicable to the specific client. To the left of each item property is a dropdown field that defines how each property is used by the client.
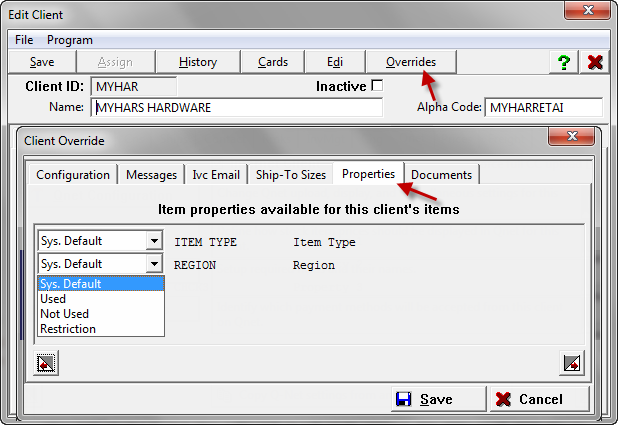
The available options are:
- Sys. Default: Uses the setting in the Item Property. If the setting is All Clients, the Item Property is available for the client.
- Used: Selecting this option activates the Item Property and makes it available in Item Maintenance.
- Not Used: Selecting this option deactivates the property and suppresses it in Item Maintenance.
- Restriction: Selecting this option activates the Item Property in Item Maintenance and uses the Item Property as a user restriction on EQ/C.
Enabling Item Properties for EQ Commerce
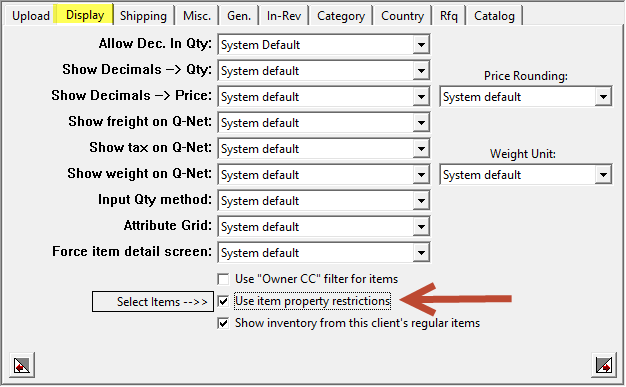
When using Item Properties as a restriction, edit the client to enable the option. Go to Client Maintenance > eComm tab > Display tab. Check the box, Use item property restrictions.
The Select Items link displays after the box is enabled. Only items that have been edited and marked as Enforce property restrictions for this item in EQ/c (in the next step) are displayed.
Item Maintenance
Each item needs to be edited to apply the property. In Item Maintenance, enter the client, edit the item, and click on the Prop tab. Select the item property. If the Item Property was marked as a Restriction, the option to select Enforce property restrictions for this item in EQ/C is available. Click the check box. Save the record.
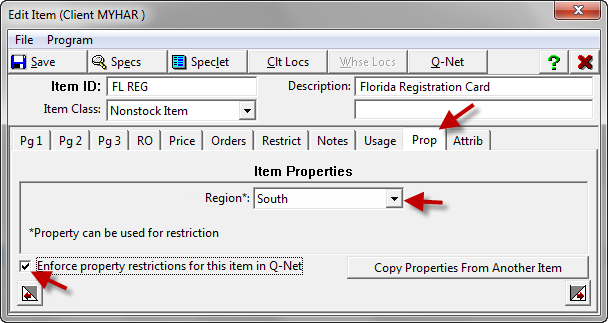
Once editing has been completed, export the client to EQ/C.
Item Properties on EQ Commerce
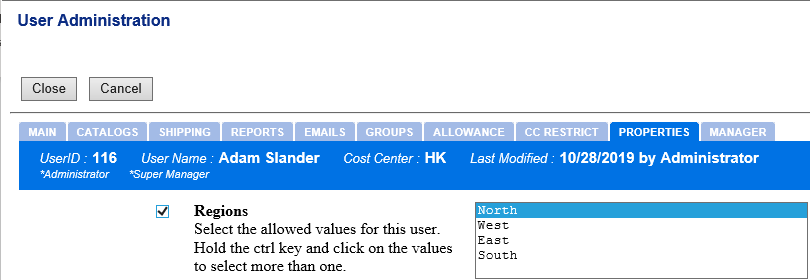
The primary function of Item Properties is to allow item restrictions at the user level. After exporting the client to EQ Commerce, log in as the Administrator or as a user with Administrator rights. In User Administration, edit the user, then click the Properties tab.
Select the Item Properties and the values that the user can view. When using drop-down properties, multiple properties can be selected by holding down the Control key. If the property is not enabled, restrictions are not applied to the user.
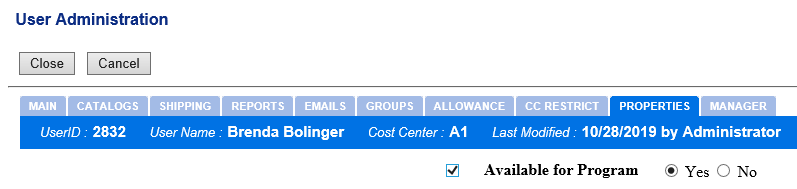
When a Yes/No checkbox is used, mark the option:
Importing Properties on User List
The Properties can be applied to users by exporting the user list from EQ/C and importing it back into EQ/C with the Properties applied to the users.
In User Administration, go to the User List. Export the User List. Export the list to Excel. The property column allows you to enter the values for the item property.
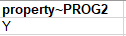
When using the Yes/No drop-down, entering a Y or N determines whether the user can view the items in that property. If the user has multiple Yes/No properties, each property is listed in its own column.
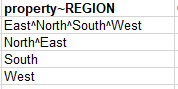
When using the Drop Down, the values are entered into the client. Multiple values can be added using a caret (^) to separate the values. Enter all values that the user can view.
Item Properties on Sales Analysis Reports
Properties also provide the ability to print Sales Analysis reports for specific item properties. To access these reports, go to O/E > O/E Reports > Invoice Reports > Sales Analysis > Sales Analysis Report.
Enter the item properties to include or exclude from the report by editing the Item Properties setting.