
Pay By Link Settings Guide
This document provides detailed instructions on how to find and configure Pay By Link settings across different levels in EQD, including System, Department, Consultant, and Client levels.
1. Where to Find Your Pay By Link Settings
Pay By Link and related payment settings (credit card, ACH, and receipt options) have moved. They now live in one consolidated settings screen, and you'll find the same button in four places depending on which level you want to configure.
Look for the button labeled:
If you're used to the old screens: Previously, these settings lived as a few options at the bottom of the AR Configuration screen (System level), and Client records had a separate Pay tab. Both have been replaced — you'll now find everything under the new Payment tab, accessed through the CC/ACH/Pay By Link Options button.
2. Why this changed
Previously, Pay By Link settings could only be configured at the System (AR Configuration) and Client levels. This update makes Pay By Link options available in all four areas of EQD — System, Department, Consultant, and Client — so each level now has its own overrides.
3. How to get there
System-wide (Global) settings: AR → AR File Maintenance → AR Configuration →
This sets your default settings for the entire system.
4. Department-level settings: GL → GL File Maintenance → Department Maintenance → (select or add a department) →
Note: Department-level settings only come into play if a Department ID is entered under the consultant's Commission tab, and that consultant is set to follow the department default. If no department is entered at the consultant level, the department setting is never used — so you don't need to configure anything here unless you're actually using departments.
5. Consultant-level settings: OE → OE Maintenance → Consultant Information → Consultant Set Up → (select consultant, Edit) Default Tab.
A Consultant-level override takes priority over the Department default.
6. Client-level settings: Client Maintenance → (select a client) → Setup Tab
A Client-level override takes priority over everything else — see "How the settings work together" below for the full fallback order.
7. How the settings work together
Settings apply in this order, from most specific to least specific:
Client → Consultant → Department → System-wide
If you don't set anything at the Client level, the system uses the Consultant setting. If nothing is set there, it uses the Department setting. If nothing is set there, it falls back to your System-wide default.
This means you only need to set overrides where a specific department, consultant, or client actually needs something different from your standard setup.
8. Seeing what's actually in effect
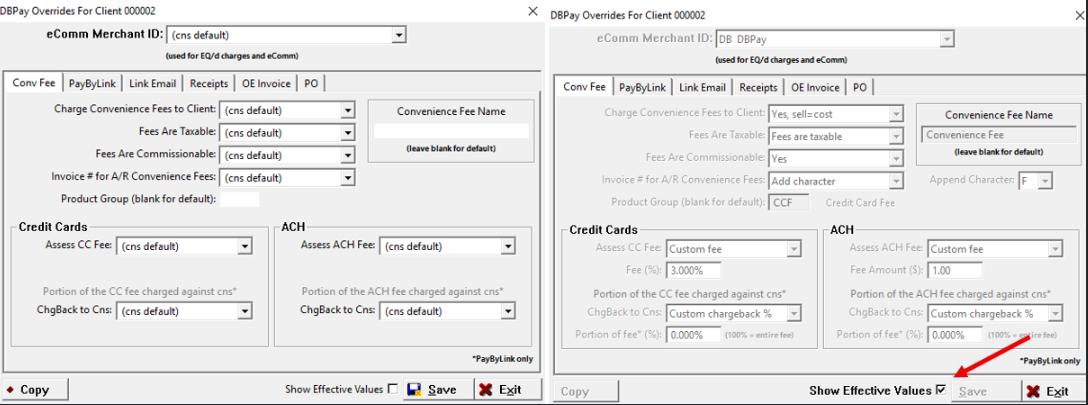
On any of these screens, you can check the Show Effective Values box to see the setting that's actually being used after all the overrides are applied — not just what's saved at that particular level. While this box is checked, the fields are locked so you can review safely without making accidental changes.
9. What else is new
• CC Consultant on Receipt — you can now choose to copy the assigned consultant on emailed payment receipts. This follows the same Client → Consultant → Department → System-wide hierarchy as other settings.
• Link Expiration — set on the System-wide (AR Configuration) screen, this controls how many days a Pay By Link stays active before it expires. Can be configured up to 60 days.
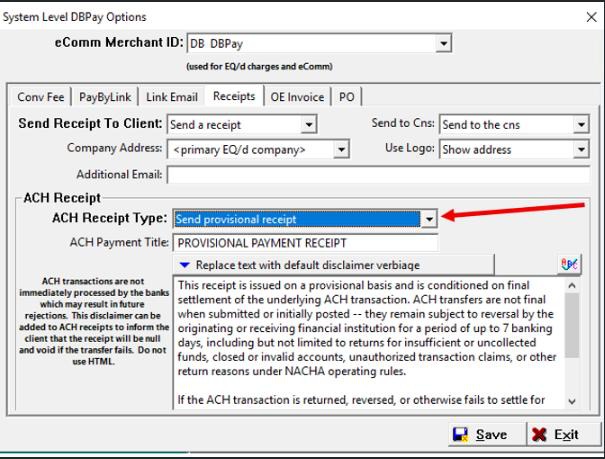
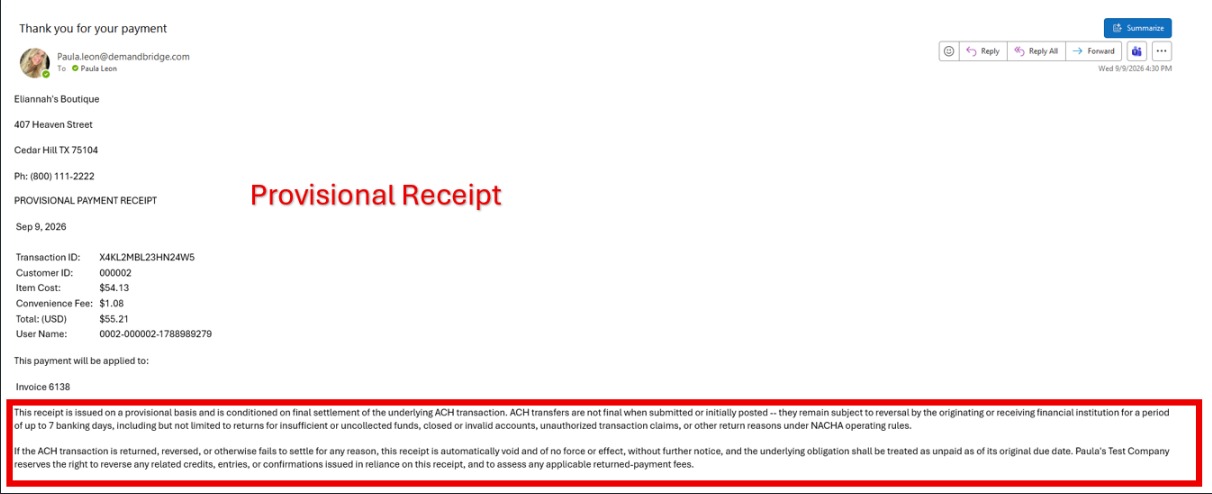
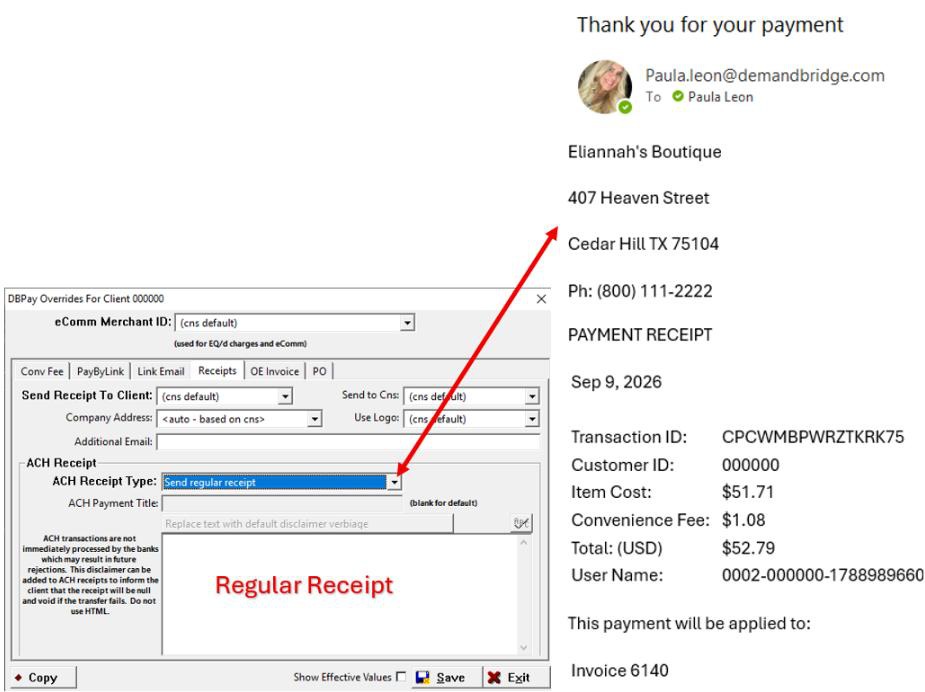
• ACH Payment Receipts — customers paying by ACH now receive a receipt clearly marked as provisional, noting that ACH payments aren't final until the transaction settles.
10.
11.
12.
13. Need help?
If you have questions about setting up or finding these options, reach out to our support team — we're happy to walk through it with you.