EQD: Scheduler Quick Start Guide
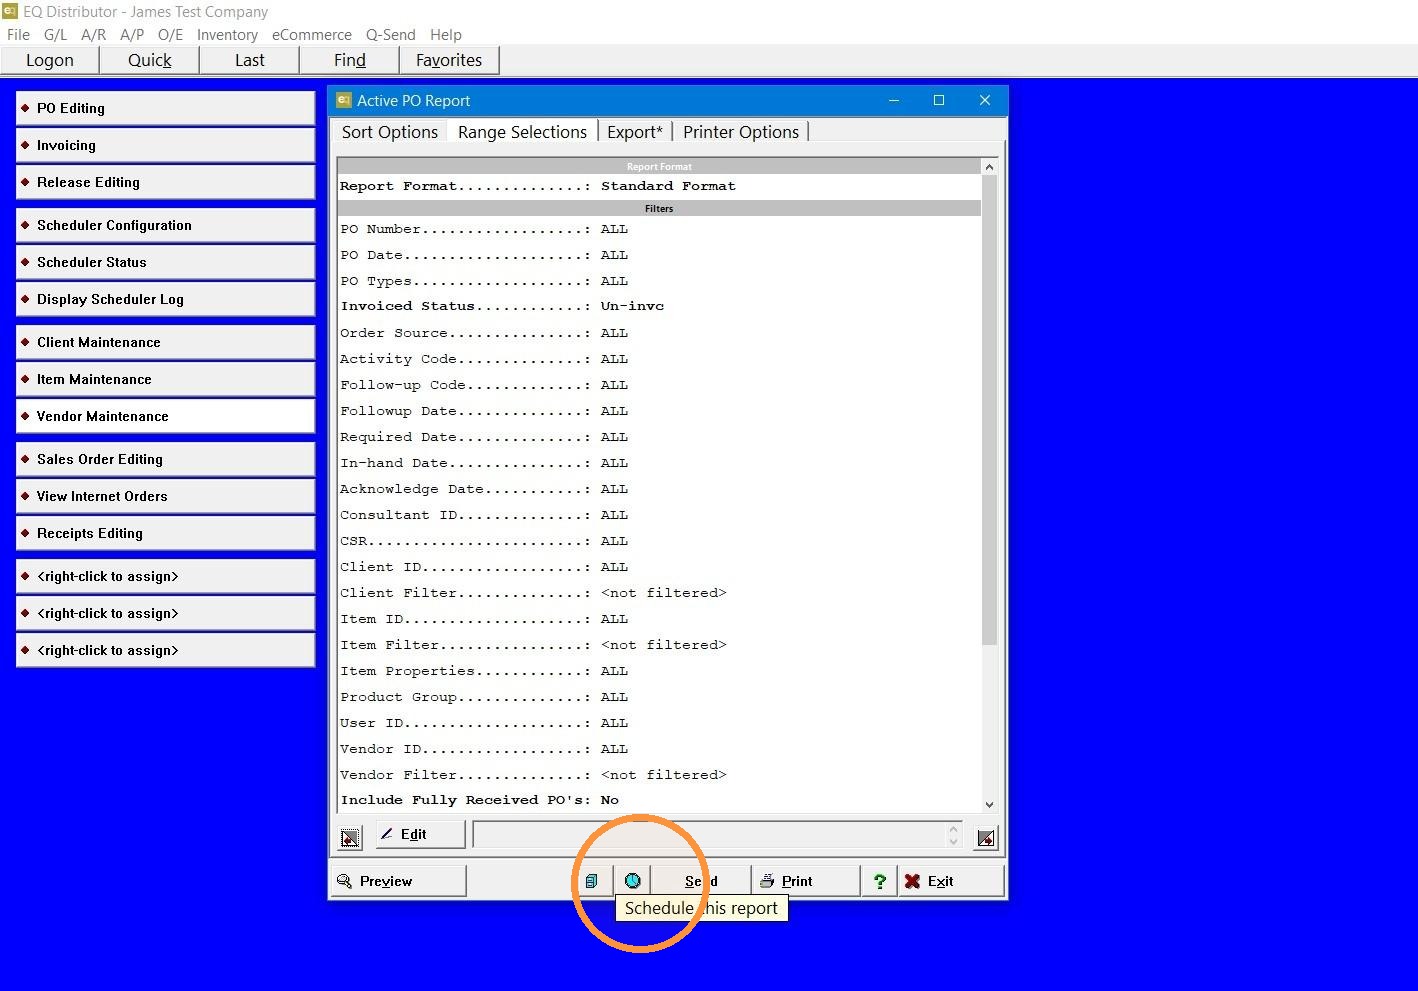
1. Go to the report you want to schedule. Choose your desired range selections and then click the blue clock icon at the bottom of the window.
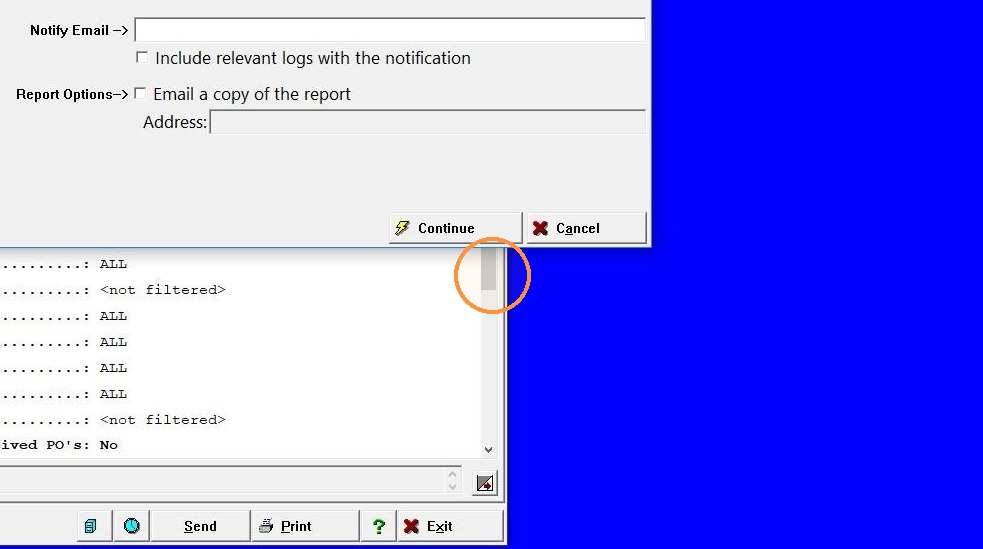
2. - You can use the default job type. Or if this is for a specific person or client you can put that here for reference along with the report type.
- Choose the Interval(how often this runs) and the start time.
- Pick the days of the week you would like this to run
- The Notify Email will receive a notification when a report is sent or if it failed.
- Report Options> Email a copy of the report, you can add additional email addresses here separated by a comma or semicolon.
- Once you are ready click "Continue"
3. - If you want this report to be emailed make sure Email a PDF is selected.
- The Cover Page Remarks will be the body of the email.
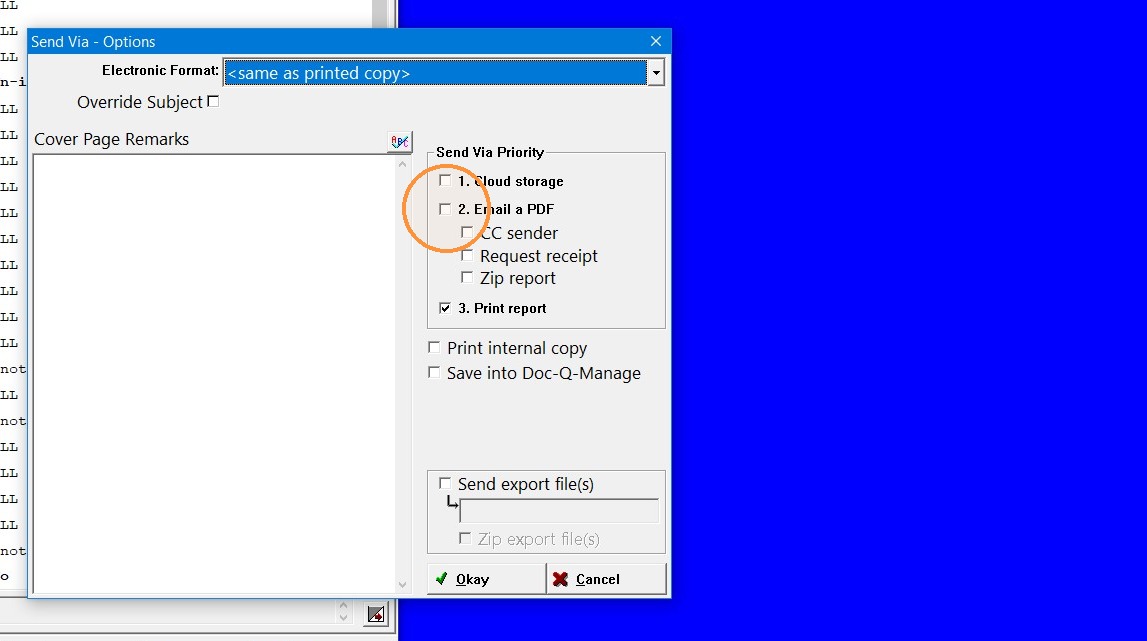
4. If this report is being exported to Excel using the EQD report export manager and you want that to be sent, check the box next to Send export file(s) and then put in an email address.
When you are ready click Okay
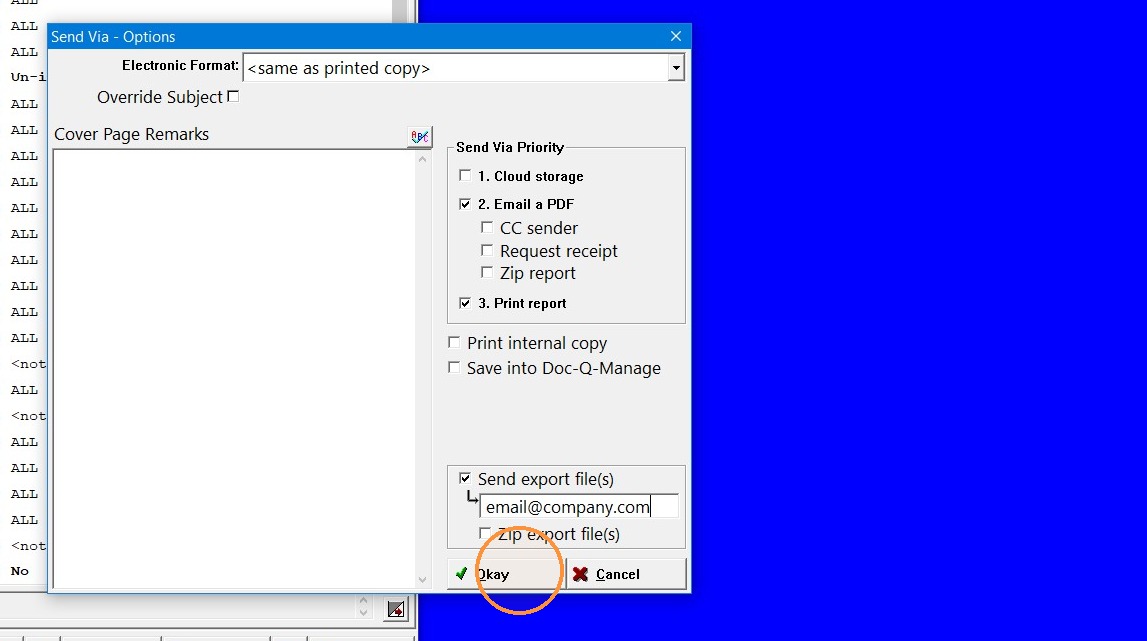
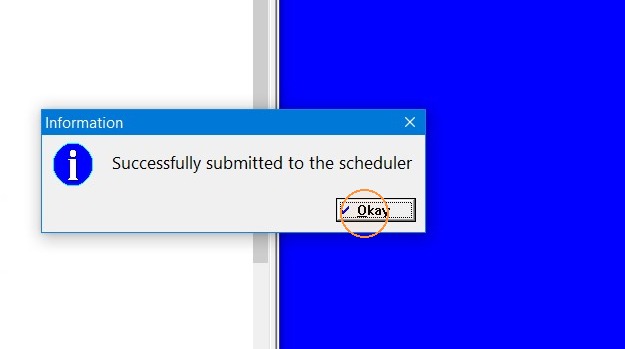
5. Click "Okay"
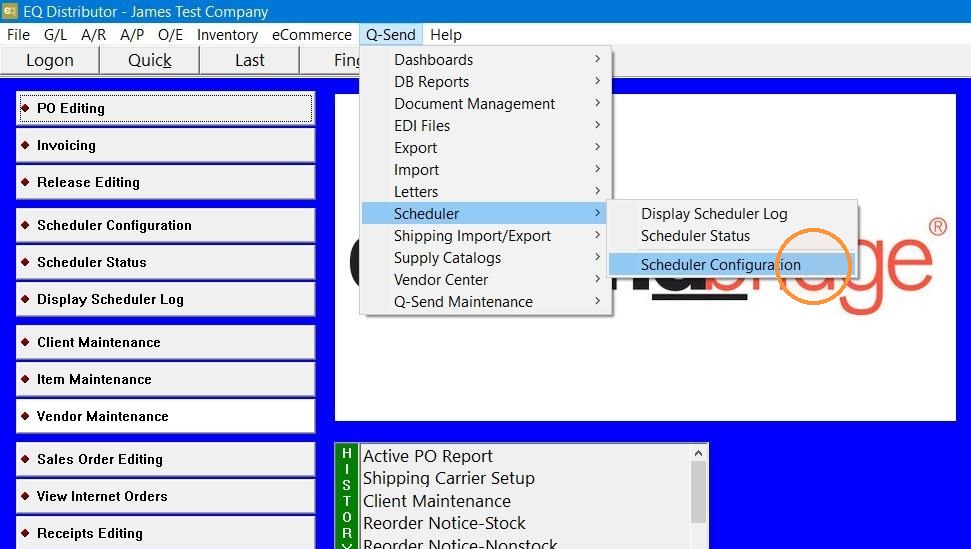
6. If you want to see your scheduled reports you can view them in Q-Send> Scheduler> Scheduler Configuration
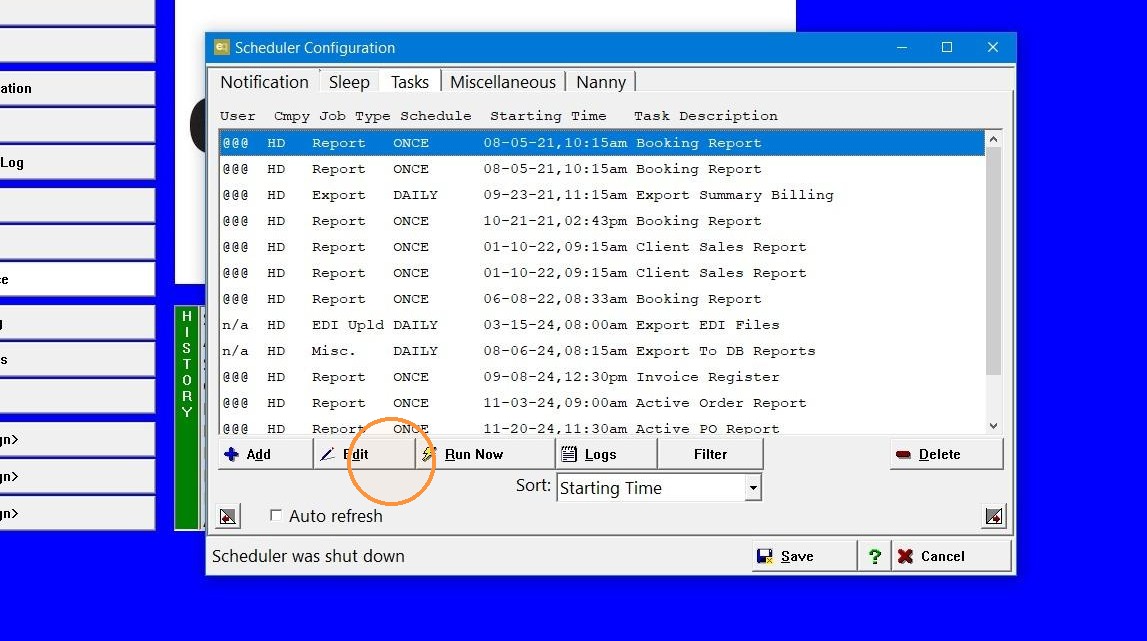
7. You can Edit the report schedule or disable or delete a scheduled report.
Note: If you need to change the range selections of a report, the only option is to schedule the report again with the changed range selections. Then delete the old scheduled report.
Tip: Contact DemandBridge support If you have further questions.